Vegan Whipped Cream
This vegan whipped cream is a luscious and fluffy treat infused with vanilla and delicately sweetened with powdered sugar. It’s given a full-bodied texture from full-fat coconut milk and coconut oil for a texture that emulates regular whipped cream.

This vegan whipped cream is unbelievably easy to prepare and requires only a handful of ingredients, making it the ideal option for anyone looking to enhance their desserts in a cost-effective way. For another kitchen staple, check out my vegan custard.
Why I love this recipe
Vegan cream is notoriously finicky and tricky to whip. For one reason or another, the results are always inconsistent at best. Don’t worry, though — I’ve solved that problem with the addition of coconut oil and cream of tartar!
This recipe has been carefully crafted to turn out perfectly fluffy every time. It offers a billowy texture and slightly sweet taste, just like traditional whipped cream.
You’ll be shocked at the light, creamy, and airy consistency you can achieve through a blend of coconut milk and oil, powdered sugar, and vanilla. You can use it to top off your favorite desserts, garnish fruit salads, or dollop onto hot chocolate or milkshakes.
“This recipe for vegan whipped cream is just what I needed! I used it in dessert parfaits with mixed fruit and it was well received. We are trying to eat more plant-based foods, but vegan desserts can often be a challenge for me.” — STEPHANIE
Add your review >
Ingredient notes
The great news is you only need 5 ingredients for this vegan whipped cream recipe! Find full a breakdown and suitable substitutes below.

Coconut milk
I recommend Thai full-fat coconut milk. These cans generally have the highest fat content, which results in a better texture. Also, try to source coconut milk with real coconut as an ingredient, not coconut extract.
Refined coconut oil
It’s best to use refined (flavorless) coconut oil unless you don’t mind a light coconut flavor. Check for refined coconut oil online if you can’t find any in stores.
Powdered sugar
The cornstarch in powdered sugar helps to thicken and add structure to vegan whipped cream. Plus, powdered sugar adds a delicate sweetness and doesn’t alter the color.
Substitute: If you don’t have powdered sugar, make your own by blending 1 cup of cane sugar with 1 tablespoon of cornstarch.
Vanilla extract
Adds a sweet, creamy flavor that really enhances the whipped cream. I recommend pure vanilla extract for the most aromatic taste.
Cream of tartar
Cream of tartar helps stabilize the whipped cream, making it stay stiff for longer.
Substitute: If you don’t have cream of tartar, you can replace it with a small amount of lemon juice or vinegar. You can also omit it, but the whipped cream won’t hold its shape as long.
For a complete ingredient list and step-by-step guide, scroll down to the recipe card.
How to make
Learn the foolproof way to make vegan whipped cream with my straightforward, easy-to-follow instructions. Look for the tips in green throughout this section for consistent and successful results!
Assembly
Step 1
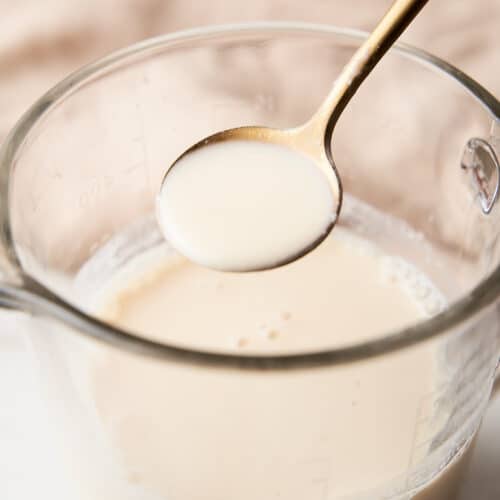
Melt the coconut oil and warm the coconut milk in a pot or microwave until lukewarm. When both are warmed, add them to a high-speed blender and mix on high until the mixture is smooth and frothy.
You want the coconut milk and oil to be at similar temperatures. This helps them emulsify better, creating a more stable base for the whipped cream.

Step 2
Transfer the blended coconut milk and oil mixture to a mixing bowl, then cover and refrigerate it for at least 6 hours until it’s thickened and chilled.
I suggest blending the mixture the night before and leaving it overnight.

Step 3
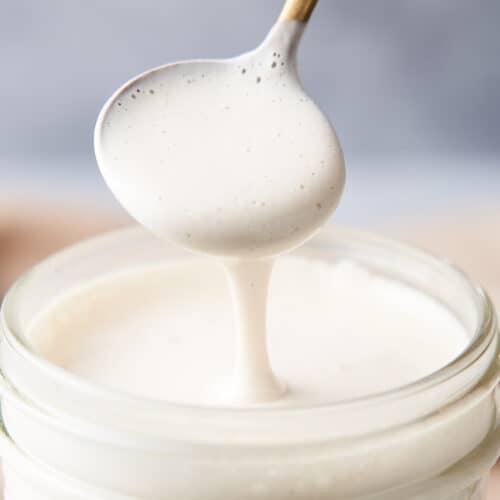
Add the powdered sugar, vanilla, and cream of tartar to the chilled bowl of coconut milk and oil. Whip the chilled mixture with a beater on high until it becomes light and fluffy and forms stiff peaks. Happy eating!
Make sure to use the same chilled bowl to prevent the mixture from warming and melting as you whip it.

Expert tip
The most important ingredient in vegan whipped cream is the milk itself. Only full-fat coconut milk from a can will work since it’s the only type of dairy-free milk with enough fat content to whip properly. Low-fat (lite) coconut milk doesn’t whip up nearly as well and won’t form stiff peaks once whipped.
Do not skip chilling the blended coconut milk and oil; otherwise, the recipe won’t work. The mixture needs to be thoroughly chilled before whipping, which is also why it really helps to use a chilled bowl.
I recommend chilling your mixing bowl and beaters in the freezer for about 15 minutes. This helps maintain the cold temperature needed to whip the mixture into stiff peaks.
Serving suggestions
The versatility of this vegan whipped cream never ceases to amaze me! Add a dollop on top of fresh fruits like strawberries, raspberries, blueberries, peaches, or mangoes for a classic pairing.
It also complements treats like vegan peach cobbler, vegan apple crisp, chocolate chip mug cake, or chocolate gluten-free mug cake. Or, serve some with your favorite drinks, such as mango pineapple smoothies, dirty chai lattes, milkshakes, and more.

Cooking tips
Clean tools: Before use, make sure all your utensils are completely clean and free of water or grease, as this can prevent the cream from whipping up properly.
Sift the sugar: Sift your powdered sugar before adding it to the mixture to avoid any lumps in your whipped cream.
Add cream of tartar early: Mix in the cream of tartar when you start whipping. It stabilizes the whipped cream and helps maintain its structure.
Adjust the sweetness: If the whipped cream is too sweet, reduce the amount of sugar. If you want it sweeter, simply add more. Just note that the consistency will vary as you increase or decrease the powdered sugar.
Don’t overwhip: Watch your time carefully. Overwhipping can cause the coconut oil to separate, leading to a grainy texture. Stop as soon as you see stiff peaks.

Frequently asked questions
It’s critical to start with cold ingredients before whipping. You also have to whip it for quite a while, so be patient. Another reason could be using poor-quality coconut milk because they don’t thicken properly. If this is the case, add a teaspoon of xanthan gum or guar gum to thicken it.
The cream of tartar helps keep it stable. If you’re not satisfied with the texture, you can add a ¼-teaspoon or so of xanthan gum or agar.
You can technically use liquid sweeteners, but the texture will be more watery. For this reason, we suggest sticking with powdered sugar as the only sweetener.
Storing
If you don’t finish all your vegan whipped cream or are preparing it for later, you can store it in the fridge to keep it stable.
Fridge
Keep the whipped cream in an airtight container for up to 3 days in the fridge.
Freezer
I don’t recommend freezing dairy-free whipped cream since the texture will change too much when thawed.
Re-whip
If the whipped cream becomes too firm in the fridge, let it sit on the counter for 5-10 minutes and re-whip it before using.
More vegan basics


Hungry for more?
If you enjoyed this recipe, please consider leaving a star rating and a comment down below! Your feedback not only helps others discover our blog but also gives us valuable insights from your experience.
Don’t forget to subscribe to our newsletter for the latest recipes, and check out our shop for our top kitchen recommendations. Thank you for supporting BBV!
Recipe

Easy Vegan Whipped Cream
Equipment
- Electric hand mixer (or stand mixer)
- Mixing bowl
- Spatula
Ingredients
- 1 cup full-fat coconut milk (lukewarm)
- 14 tablespoons refined coconut oil (melted)
- ½ cup powdered sugar
- ¾ teaspoon vanilla extract
- ½ teaspoon cream of tartar
To serve
- Fresh berries
Instructions
- Melt the coconut oil and warm the coconut milk in a pot or microwave until it is lukewarm. Add both to a high-speed blender and mix on high until the mixture is smooth.
- Transfer the blended mixture to a mixing bowl, cover, and refrigerate it for at least 6 hours, or until it’s thickened and chilled (it’s best to leave it overnight).
- Add the powdered sugar, vanilla, and cream of tartar to the chilled bowl of coconut milk and oil. Using an electric hand mixer or stand mixer with a whisk attachment, whip the chilled mixture on high speed until it becomes light, fluffy, and forms stiff peaks, about 3-5 minutes.
- You can use the whipped coconut cream immediately, or store it in the refrigerator for up to 3 days. If it becomes too firm in the refrigerator, re-whip it before using it to achieve the desired texture. Happy eating!
Notes
Nutrition
Note: I’ve updated this post to include new information and helpful tips about the recipe.

Justine Drosdovech is a food writer, photographer, and one of the founders of Broke Bank Vegan. She is a self-taught plant-based chef but uses her healthcare background to craft dishes that are both delicious and nourishing.
this whipped cream turned out perfect on top of my coffee cake. such a great combo of goodness!
Hi Andrea,
That sounds like an amazing combo! Glad it turned out for you 🙂
Great recipe and I cannot believe we used coconut milk. Rich and super delicious. A must make!
Hi Giangi,
Isn’t coconut milk amazing?! We’re glad to hear it worked out for you 🙂 Thanks for leaving your feedback!
Dreamy vegan indulgence: Fluffy Whipped Cream that’s pure delight!
Hi Claudia,
We’re happy to hear you loved the recipe! Thanks for leaving a comment 🙂
Whipped cream using coconut milk..that sounds amazing. the texture looks perfect.
Hi Lathiya,
Thank you so much! It’s pretty perfect 🙂
If you’re looking for a healthy dairy free whipped cream, this is the recipe! I love that it uses coconut milk and coconut water!
Hi Pam,
We’re so happy to hear you enjoyed the recipe! Thanks for your feedback 🙂
I love this whipped cream. I’ve never used coconut milk, but I had some so I tried it. I smothered some fresh strawberries with it and it was heavenly!! Pinned!
Hi Helen,
Awesome! Whipped cream and berries is a deadly match. We’re so happy to know it worked out for you!
Delicious whipped cream I can use for everything.
Hey Nancy,
That’s so great to hear you enjoyed the recipe! Thank you for your feedback 🙂
This vegan whipped cream recipe was very easy to prepare!
Hey Andrea,
We’re so happy it was easy and worked out for you!
This recipe for vegan whipped cream is just what I needed! I used it in dessert parfaits with mixed fruit and it was well received. We are trying to eat more plant-based foods, but vegan desserts can often be a challenge for me.
Hi Stephanie,
That sounds like such a delicious dessert! Glad it went over well with everyone. Thanks for leaving your feedback!
Love the low amount of ingredients. This was so flavorful!
Hey Tyanne,
We’re so happy it worked out for you!
Instead of powdered sugar, can you use powdered monk fruit/allulose and then add a touch of powdered arrowroot instead of cornstarch?
Hi Joshua,
We haven’t tried it this way, but you should be able to do that since the volume will be similar and arrowroot should be fine. Please let us know how it goes if you try it!