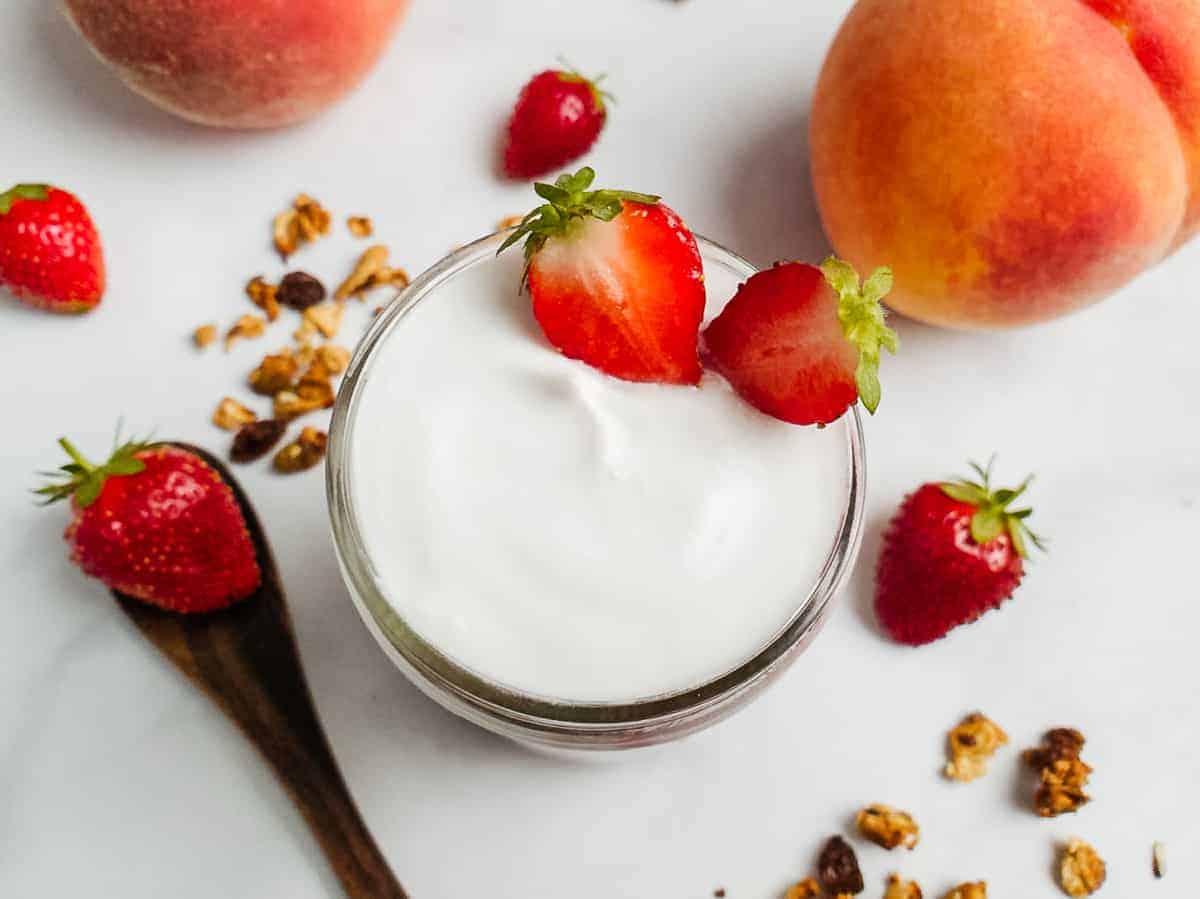
Coconut Yogurt
This homemade coconut yogurt is rich, creamy, and packed with healthy vegan probiotics! You only need 2 ingredients and a mason jar to make this tangy, refreshing treat. Serve it topped with fresh fruit or granola, or add it to smoothies and sauces!

With its short ingredient list and hands-off approach, this coconut yogurt recipe is perfect for beginner yogurt makers! Like my vegan buttermilk, all you have to do is mix the ingredients and wait for the magic to happen.
Why I love this recipe
This coconut yogurt recipe is my favorite dairy-free alternative to traditional yogurt. Unlike expensive vegan yogurt options at the store, it’s unbelievably budget-friendly. Plus, it tastes even better!
As its name suggests, it’s made from full-fat coconut milk, which gives it a unique, slightly sweet, and tropical taste. It’s also full of beneficial probiotics that aid digestion and contribute to overall gut health.
To initiate the fermentation process, simply combine the coconut milk and vegan-friendly probiotics. The result is a thick, creamy, tangy yogurt that everyone can enjoy, especially if you’re plant-based or lactose intolerant.
Ingredient notes
With only 2 ingredients in this coconut yogurt recipe, you may already have what you need in your cupboard! Find a breakdown and suitable substitutes below.

Full-fat coconut milk
Make sure you use full-fat coconut milk from a can. Coconut milk from a carton or lite coconut milk from a can is too thin and won’t work. You can experiment with other plant-based milks, but I’ve only tested this recipe with coconut milk.
Vegan probiotics
Ensure your probiotics are vegan-friendly by checking that they aren’t made with gelatin capsules and don’t contain milk products. Also, avoid brands that include prebiotics in their formula; otherwise, your coconut yogurt may spoil.
For a complete ingredient list and step-by-step guide, scroll down to the recipe card.
How to make
Learn how easy it is to make coconut yogurt with my step-by-step instructions. Look for all the tips in green throughout this section for consistent and successful results!
Assembly
Step 1
To properly clean your jar, wash it thoroughly in VERY hot, soapy water. Then, rinse it in hot water and let it dry face down on a clean towel. Let your jar cool completely before starting the recipe.
It’s essential to start with a clean jar so you don’t introduce other bacteria into the coconut milk as it ferments.

Step 2
Add the coconut milk to the clean mason jar, then open both probiotic capsules and add the contents to the jar as well. Mix the two thoroughly with a wooden, ceramic, or plastic spoon.
Metal utensils can react with the probiotics and prevent the yogurt from setting. Only use wood, ceramic, or plastic spoons to stir the yogurt.

Step 3
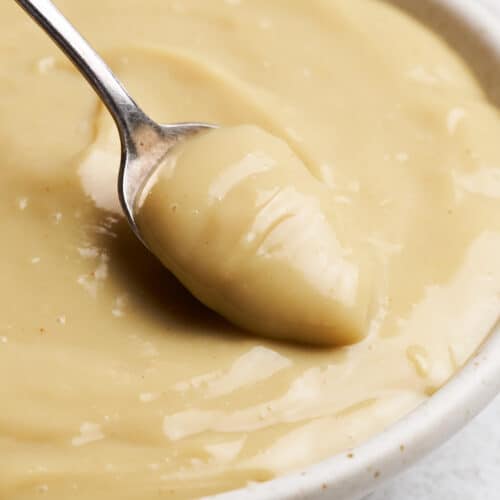
Cover your jar with a tightly woven cheesecloth or thin tea towel and secure it with an elastic. Keep the mixture in a warm place (an oven with the light on is a prime spot) for 12-36 hours. When the coconut yogurt is to your preferred tanginess, put a lid on it and transfer it to your fridge to chill and thicken. Happy eating!
I typically stop the fermentation after about 18-20 hours, but yours may need longer, depending on your climate and how fast it ferments.

Expert tip
To get the best results with your homemade coconut yogurt, it’s essential to let the probiotics fully activate by keeping the jar consistently warm.
Maintaining a steady temperature between 75-85 degrees Fahrenheit allows the probiotics to create the tangy flavor and thick texture that makes this yogurt shine.
If your home tends to be cool, the oven with just the light on provides a gentle, consistent warmth. You can also ferment your coconut yogurt in an Instant Pot with the yogurt setting on.
Serving suggestions
This coconut yogurt is the perfect base for any flavor. You can leave it as-is, add a touch of maple syrup, or mix it with strawberry compote or blueberry compote for a fruity kick.
Make vegan granola parfaits with fresh fruits, add a dollop onto vegan buttermilk pancakes or vegan French toast, incorporate it into a mango pineapple smoothie, and mix it into a bowl of vegan oatmeal or high-protein overnight oats.
Cooking tips
Cleanliness is key: Remember to clean the jar and spoon thoroughly. Any bacteria present can interfere with the fermentation process.
Avoid flavored coconut milk: Stick to plain coconut milk, as added sugars or flavorings can interfere with fermentation and the desired tangy taste.
Use a good quality probiotic: Since probiotics are one of two ingredients, it’s important to use a quality brand. Refer to my recommendations for ideas.
Check on the mixture: Stir and taste the yogurt after 12 hours to check its consistency and tanginess. If it isn’t tangy enough, continue fermenting, or refrigerate it if it’s already reached your preferred flavor.
Customize add-ins last: Add sweeteners, fruit, or spices after the fermentation process to preserve the probiotics and prevent the yogurt’s flavor from altering.

Frequently asked questions
You can use lite coconut milk in a pinch, but I don’t recommend it. Coconut yogurt gets its thick, rich, and creamy texture from the fat found in full-fat canned coconut milk.
It’s likely due to poor quality or lack of full-fat coconut milk. Also, your probiotics may not be active anymore. These are the two most common issues with homemade yogurt that isn’t thickening.
Grainy yogurt usually results from not thoroughly mixing the coconut milk and probiotics or using a poor-quality coconut milk brand. It’s completely fine to eat, but the texture will be off.
Storing
Coconut yogurt is quite simple to store, so I always recommend having some on hand!
Fridge
Keep your coconut yogurt in a mason jar with the lid in the fridge for up to 7 days.
Freezer
You can make DIY frozen coconut milk yogurt by transferring the recipe to the freezer. Keep it in a freezer-safe container for up to a month. Just note that the texture may turn grainy if you thaw the yogurt.
Best coconut milk brands
Selecting the right coconut milk has an enormous effect on the outcome of homemade coconut yogurt. Here are the top coconut milk brands I recommend:
- Aroy-D Coconut Milk: Aroy-D offers an ultra-rich, creamy, and smooth consistency. It’s one of my favorites for its consistent results.
- Savoy Coconut Cream: Another top choice for its incredibly rich and creamy texture. Savoy’s coconut cream is also unsweetened.
- Chaokoh Coconut Milk: A Thai favorite known for its thick, creamy texture and rich flavor, making it perfect for coconut yogurt.
- Native Forest Simple Organic Unsweetened Coconut Milk: Native Forest doesn’t provide the same richness and creaminess but works in a pinch.
- 365 Everyday Value Organic Coconut Milk: This is Whole Foods’ brand, which is another solid choice. It offers a good balance of creaminess and coconut flavor.
- Thai Kitchen Organic Coconut Milk: Offers a full-bodied, creamy texture and rich flavor. It’s also organic and comes in BPA-free cans.
Best vegan probiotics
I’m partial to the brand Naturelo, but there are several great options for vegans. Look for probiotics that contain Lactobacillus acidophilus, Bifidobacterium bifidum, Bifidobacterium lactis, and Streptococcus thermophilus. Here are the top vegan-friendly probiotics:
- Naturelo Probiotic: High-quality option packed with the essential bacteria strains required for successful fermentation.
- Garden of Life Raw Probiotics: Offers a potent blend of several bacteria strains that work great for homemade coconut milk yogurt.
- NOW Foods Probiotic-10: A more affordable option, but it still works!
- Culturelle Daily Probiotic: Another popular brand that’s easily accessible and contains several of the required strains for yogurt fermentation.
- Yogurt starters: If vegan-friendly probiotics aren’t available, add a few spoonfuls of store-bought vegan yogurt or use a vegan yogurt starter kit.
More vegan basics


Hungry for more?
If you enjoyed this recipe, please consider leaving a star rating and a comment down below! Your feedback not only helps others discover our blog but also gives us valuable insights from your experience.
Don’t forget to subscribe to our newsletter for the latest recipes, and check out our shop for our top kitchen recommendations. Thank you for supporting BBV!
Recipe

Homemade Coconut Yogurt (With 2 Ingredients)
Equipment
- Mason jar
- Cheesecloth
- Wooden spoon
Ingredients
- 1 can full-fat coconut milk
- 2 capsules vegan-friendly probiotics
Add-Ins
- Maple syrup, agave, monk fruit, or stevia
- Fruit, berries, mango, peaches, etc.
- Vanilla extract or powder
- Lemon juice or zest
Instructions
- First, clean your mason jar thoroughly in very hot, soapy water. Then, rinse it in hot water and dry it face down on a clean towel. Let the jar cool completely before pouring the coconut milk in.
- When the jar is cool, add the can of coconut milk. Open both probiotic capsules and add the contents to the jar. Mix well with a wooden, ceramic, or plastic spoon (avoid metal as it can react with the probiotics). Cover the jar with a cheesecloth or a thin tea towel and secure it with an elastic.
- Keep the jar in a warm place (an oven with the light on is a great spot) for 12-36 hours, depending on how tangy you like it. I typically like ours after about 18-20 hours.
- When the coconut yogurt reaches your preferred tanginess, switch out the cheesecloth for a lid and transfer it to your fridge to chill and thicken for 12 hours or overnight.
- Serve your homemade coconut yogurt with berries, granola, or on its own for a probiotic-rich snack. Happy eating!
Notes
Nutrition
Note: I’ve updated this post to include new information and helpful tips about the recipe.

Justine Drosdovech is a food writer, photographer, and one of the founders of Broke Bank Vegan. She is a self-taught plant-based chef but uses her healthcare background to craft dishes that are both delicious and nourishing.