Chickpea Fries
Chickpea fries (aka panisse) are a popular snack from the South of France. Crispy on the outside yet creamy on the inside, they make a perfect companion to your favorite dipping sauce. All you need is chickpea flour, salt, and water!

With just a few common ingredients and some simple steps, you can transform chickpea flour into a crispy, golden snack that’s both nutritious and delicious. Much like my lentil patties, they’re a great way to sneak some more protein into your diet!
Why I love this recipe
When I first learned about chickpea fries, I immediately began recipe-testing non-stop to come out with something delicious. After much experimentation, I’m happy to say this crispy, creamy snack is one for the books!
Made with just 3 ingredients, it’s the kind of recipe that requires minimal cooking expertise and effort but delivers an ultra-satisfying flavor and texture. The secret to a fry that holds up under frying conditions is in the batter formation.
Don’t worry, my tips will help you achieve the perfect consistency every time! This naturally vegan and gluten-free recipe is a fantastic choice for anyone, whether you’re feeding a family, entertaining friends, or just looking for a quick and healthy snack.
Ingredient notes
You only need 3 base ingredients for chickpea fries, but I like to add one optional one. Find a breakdown and suitable substitutes below!


Chickpea flour
Chickpea flour makes up the base of the fries, providing a nutty flavor and a dense texture. You can use store-bought chickpea flour (also known as garbanzo bean flour), or make your own by blending dry chickpeas in a high-speed blender.
Garlic powder
While optional, garlic powder adds a savory, slightly toasty flavor to the chickpea fries. I prefer it over minced garlic cloves for its uniform distribution of flavor in the batter.
Substitute: Onion powder will work for a sweeter but still savory flavor.
Rosemary aioli
I love to serve my chickpea fries with a side of creamy rosemary aioli, but this is also completely optional. You just need vegan mayo (Hellmann’s is my favorite), dried or fresh rosemary, fresh garlic, and lemon.
For a complete ingredient list and step-by-step guide, scroll down to the recipe card.
How to make
Learn the easiest way to make chickpea fries with my step-by-step instructions. Look for the tips in green throughout this section for consistent and successful results!
Preparation
Lightly grease an 8×8 casserole dish with cooking spray. This will prevent the chickpea batter from sticking, ensuring easy removal after chilling. Finely mince the garlic and rosemary for the dip.
Cooking
Step 1
In a medium bowl, combine the chickpea flour, garlic powder, and salt. Whisk them thoroughly to distribute the flavors evenly and remove any large clumps.

Step 2
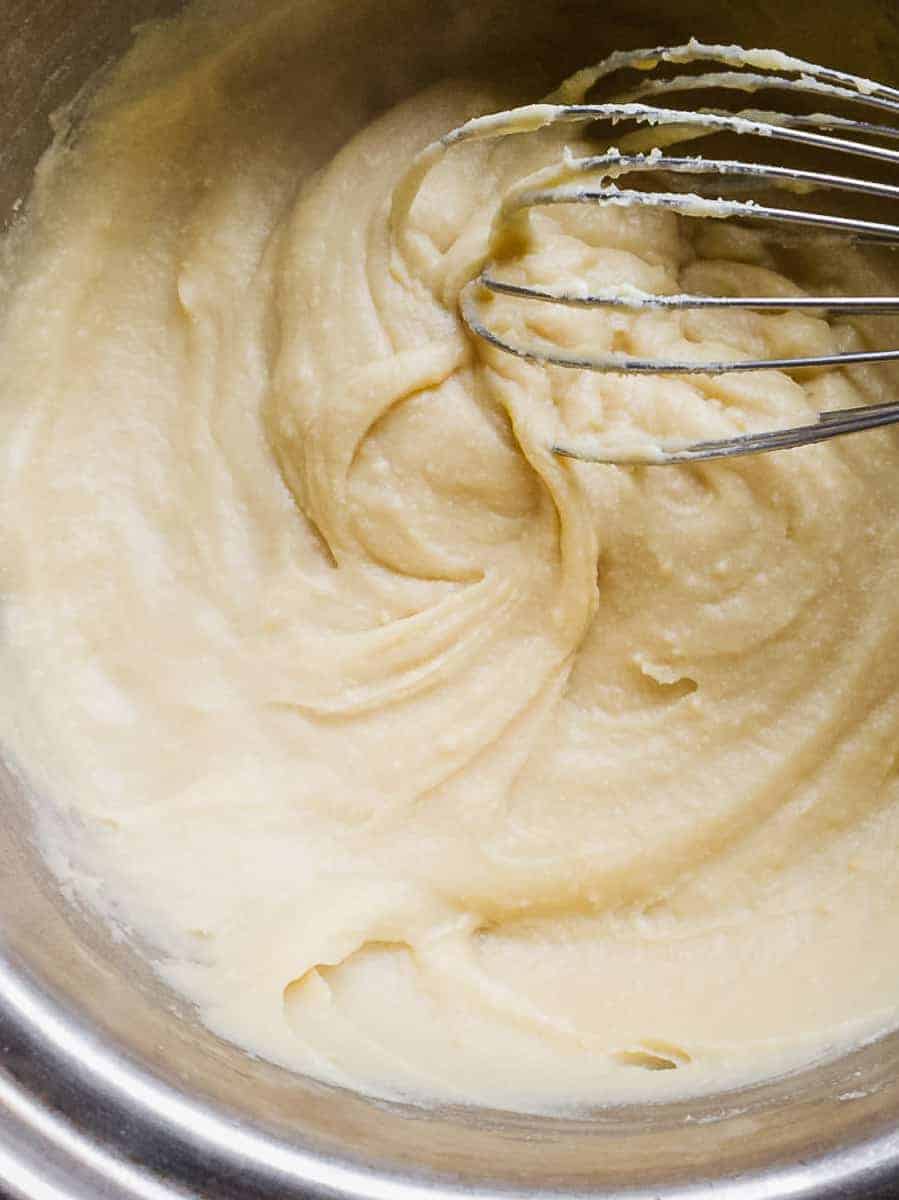
Bring 2 cups of water to a simmer in a medium saucepan. Slowly add the dry ingredients to the simmering water while continuously whisking. This prevents lumps from forming and ensures a smooth batter.
Don’t stop whisking until the mixture becomes thick and smooth, similar to polenta, which should take about 3-5 minutes.

Step 3
Quickly transfer the hot chickpea batter to the greased casserole dish, smoothing the top with a spatula. You need to work fairly fast here since the batter starts setting as soon as it comes off the stove.

Step 4
Cover the dish with plastic wrap, pressing it down onto the surface of the chickpea batter to prevent a skin from forming on top. Place the casserole dish in the refrigerator and let the batter chill for 4-6 hours, or overnight.

Step 5
In a small bowl, combine the minced rosemary, minced garlic, lemon juice, and vegan mayo. Mix well until all the ingredients are well incorporated. Cover the dip and refrigerate it until you’re ready to serve.

Step 6
After a few hours or overnight, turn the dish upside down on a cutting board and gently knock the mixture out. Slice the block into thick fries.
You may have to pull it away slightly from the edges to break it free.

Step 7
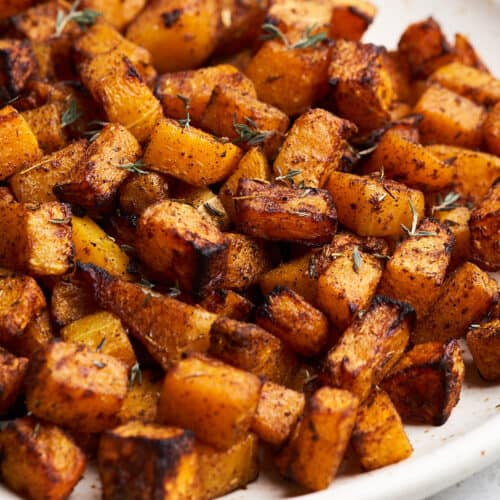
Heat about a cup of neutral frying oil in a deep skillet over medium-high. Fry the pieces in batches until they are golden brown on each side. Drain them on a paper towel-lined plate to absorb excess oil.

Expert tip
In order for the fries to hold their shape, the batter MUST be the right consistency before chilling. Be patient with whisking, waiting until the consistency is similar to polenta.
It should be thick enough to hold its shape when cut, but not so dense that it’s hard to transfer to the baking dish. Also, give the batter ample time to set in the fridge before cutting.
This step will prevent the fries from falling apart and turning mushy in the pan. It all comes down to having patience with your chickpea batter!
Serving suggestions
If you want to try other dips besides rosemary aioli, these chickpea fries also pair well with spicy garlic aioli, smoky vegan chipotle sauce, or zesty toum.
For a cool and refreshing option, serve them with vegan ranch, dairy-free sour cream, or vegan tzatziki. To add a little tang, you can even try vegan tartar sauce. And for another healthy twist on traditional French fries, try these yuca fries!
Cooking tips
Sift the chickpea flour: Sifting the chickpea flour first helps remove any lumps, resulting in a smoother batter.
Test one: Try frying one at the start to make sure your oil is at the right temperature. This also helps you determine how long to fry it for.
Consistent frying temperature: Maintain a consistent oil temperature between 350-375 degrees Fahrenheit for even frying and to prevent the fries from absorbing too much oil.
Refreshing the oil if needed: If you’re frying multiple batches, it may be necessary to change or filter the oil. Old, burnt bits can stick to the fries and spoil their taste.

Frequently asked questions
If your chickpea batter isn’t firming up, you likely didn’t whisk it with the water long enough. Before transferring it to the fridge, it needs to be quite thick in the saucepan (like polenta).
If the batter is runny, cook it a bit longer or add a little more chickpea flour.
Storing & reheating
Chickpea fries are best served immediately after frying for the crispiest texture, but you can store them if you have leftovers. Let them cool to room temperature before storing to prevent a soggy texture.
Fridge
Transfer the fries to an airtight container. You can keep them like this for up to 3-4 days.
Freezer
Freezing is also an option. Place them in a freezer-safe bag or container, and they can last for up to a month. There is no need to thaw them before reheating.
Reheating
The best way to reheat chickpea fries is in an oven or air fryer. Warm them in the oven at 350 degrees Fahrenheit or the air fryer at 325 degrees Fahrenheit for 10-12 minutes until they’re crispy and warm. If they’re frozen, add 5-10 more minutes.
More crispy snacks


Hungry for more?
If you enjoyed this recipe, please consider leaving a star rating and a comment down below! Your feedback not only helps others discover our blog but also gives us valuable insights from your experience.
Don’t forget to subscribe to our newsletter for the latest recipes, and check out our shop for our top kitchen recommendations. Thank you for supporting BBV!
Recipe

Crispy Chickpea Fries (Panisse)
Equipment
- Large skillet
- Medium saucepan
- Whisk
- Mixing bowl
- 8×8 casserole dish
Ingredients
Chickpea Fries
- 1 cup chickpea flour
- 1 teaspoon garlic powder
- 1 teaspoon salt
- 2 cups water
- 1 cup neutral oil for frying
Dip
- ¼ cup vegan mayo
- ½ tablespoon dried rosemary, finely minced
- 1 clove garlic, finely minced
- 2 tablespoons fresh lemon juice
Instructions
Chickpea batter
- Lightly grease an 8×8 casserole dish with cooking spray Set aside.
- Whisk the chickpea flour, garlic powder, and salt together in a medium bowl. Once combined, bring 2 cups of water to simmer in a medium saucepan.
- While continuously whisking, slowly add the dry ingredients to the saucepan. Keep whisking until the mixture is smooth and thick (like polenta), about 3-5 minutes.
- Transfer the batter to the greased casserole dish, quickly smoothing the top with a spatula. Cover the dish with plastic wrap, pressing it down so it's touching the chickpea batter. Transfer the dish to your fridge to chill for 4-6 hours, or overnight.
Dip
- In the meantime, finely minced the rosemary, or crush it in a mortar and pestle. In a small bowl or container, mix the rosemary, minced garlic, lemon juice, and vegan mayo together. Taste and adjust seasonings as needed. Cover and transfer to your fridge.
Frying
- After the chickpea batter has cooled, turn the dish upside down on a cutting board and knock the mixture out (you may have to pull it away slightly from the edges to break it free). Slice it into ½-inch wide rectangle pieces.
- Heat about 1 cup of neutral oil in a pan over medium-high. You’ll know the oil is hot enough when you stick a wooden handle in and see bubbles forming.
- Fry the pieces for 2-4 minutes on each side, or until golden brown. Transfer them to a paper towel-lined plate to absorb excess oil. You may have to fry them in batches depending on how big your saucepan is.
Air Fryer
- Set the air fryer to 400°F, and lightly spray both the chickpea fries and air fryer with neutral cooking oil. Spread the fries out evenly in a single layer.
- Air fry for 5 minutes. Flip the fries, and cook them for another 5-7 minutes. If they're looking dry, add a little more oil when you flip them. Again, you may need to cook them in batches depending on the size of your air fryer.
- Serve your chickpea fries immediately while hot with a side of rosemary garlic aioli or your favorite dipping sauce. Happy eating!
Notes
Nutrition
Note: I’ve updated this post to include new information and helpful tips about the recipe.

Mitch Chapman is a food writer, photographer, and one of the founders of Broke Bank Vegan. With a background in healthcare and the restaurant industry, he has a passion for sharing healthy yet flavorful plant-based food.
have you tried baking them?
made yesterday and it was a flop. didn’t let them set enough.. other recipe said to let it sit 15 min… will do YOURS next time and try baking!
Hi Paula,
We have not tried baking (just air-frying) these chickpea fries. Let us know how they turn out if you try baking them!
Gonna buy Bob’s Garbanzo Bean Flour and air fry these. Can’t wait! I’m belgian and vegan, and french fries are my weakness; however, starting to make healthy alternatives like these.
Hey Geert,
That’s awesome! We hope you enjoy the recipe 🙂 They are definitely a super unique and tasty alternative to French fries!
They came out great, and delicious! Now, my sister in Dallas wants to make them after I sent her a picture. Wish I could post a picture. I didn’t even have to put oil on my nonstick air fryer. This is so amazing – no oil, no salt french fries!
Hi Geert,
That’s amazing!! We’re so glad they turned out for you! Thanks for letting us know how the recipe turned out 🙂