Vegan Pie Crust
Learn how to make a perfectly buttery, flaky, and rich vegan pie crust from scratch in this detailed tutorial! We’re sharing all the most important success and troubleshooting tips, FAQs, and much more. Whether you’re making a vegan pumpkin pie or a vegan pot pie, this recipe is a guaranteed winner.
❤️ Why you’ll love this recipe
- Flaky texture: Despite being vegan, this non-dairy pie crust is just as flaky and buttery as any of its non-vegan counterparts.
- Simple ingredients: Our easy vegan pie crust is made with everyday pantry staples, each of them being accessible and inexpensive around the world.
- Versatile: Whether you’re in the mood for sweet or savory, this crust is a perfect base for all your favorite recipes.
- Foolproof method: With our clear step-by-step instructions, even baking beginners will find this recipe simple to make.
If you want to use your vegan pie crust recipe, you should really check out our vegan pot pie, vegan pecan pie, vegan sweet potato pie, vegan apple pie, and vegan pumpkin pie.
🥧 The best vegan pie crust
When it comes to baking, making a pie crust from scratch may be one of the most satisfying things you can accomplish. But more often than not, homemade versions are reserved for special occasions since they can take so long to make!
However, let us be the first to tell you that pie crusts don’t have to be scary! In fact, they can even be easy with the right instructions. In this post, we’re going to walk you through preparing the best vegan pie crust from start to finish.
Knowing how to make a pie crust is the cornerstone of so many desserts, like vegan apple pie or vegan sweet potato pie. But, you can also use it for savory meals, like quiche or pot pie. In other words, the crust plays a huge role in the quality of the final recipe.
In this easy vegan pie crust recipe, we’re using just 4 simple ingredients to create a buttery, flaky, and rich result. As a bonus, learn how to properly blind-bake your pie crust to ensure a consistently baked bottom and eliminate the dreaded soggy crust scenario!
Whether you’re a vegan, entertaining vegan guests, or simply looking to try something new, this pie crust recipe is a must-try!
🌱 Is pie crust vegan?
Traditionally, pie crusts are not a vegan-friendly recipe. The characteristic richness and flakiness that their known for comes from ingredients like butter and even lard. Here are two vegan substitutes that work just as well:
- Vegan butter sticks: These offer a similar taste and texture to dairy butter. Just make sure to use vegan butter “sticks” and not vegan butter in a tub since the water content is lower in the stick versions, making them ideal for baking.
- Vegetable shortening: Another plant-based fat that gives the pie crust a pliable structure and prevents it from making a melted mess in the oven. In fact, many people swear by making pie crusts with only shortening over butter.
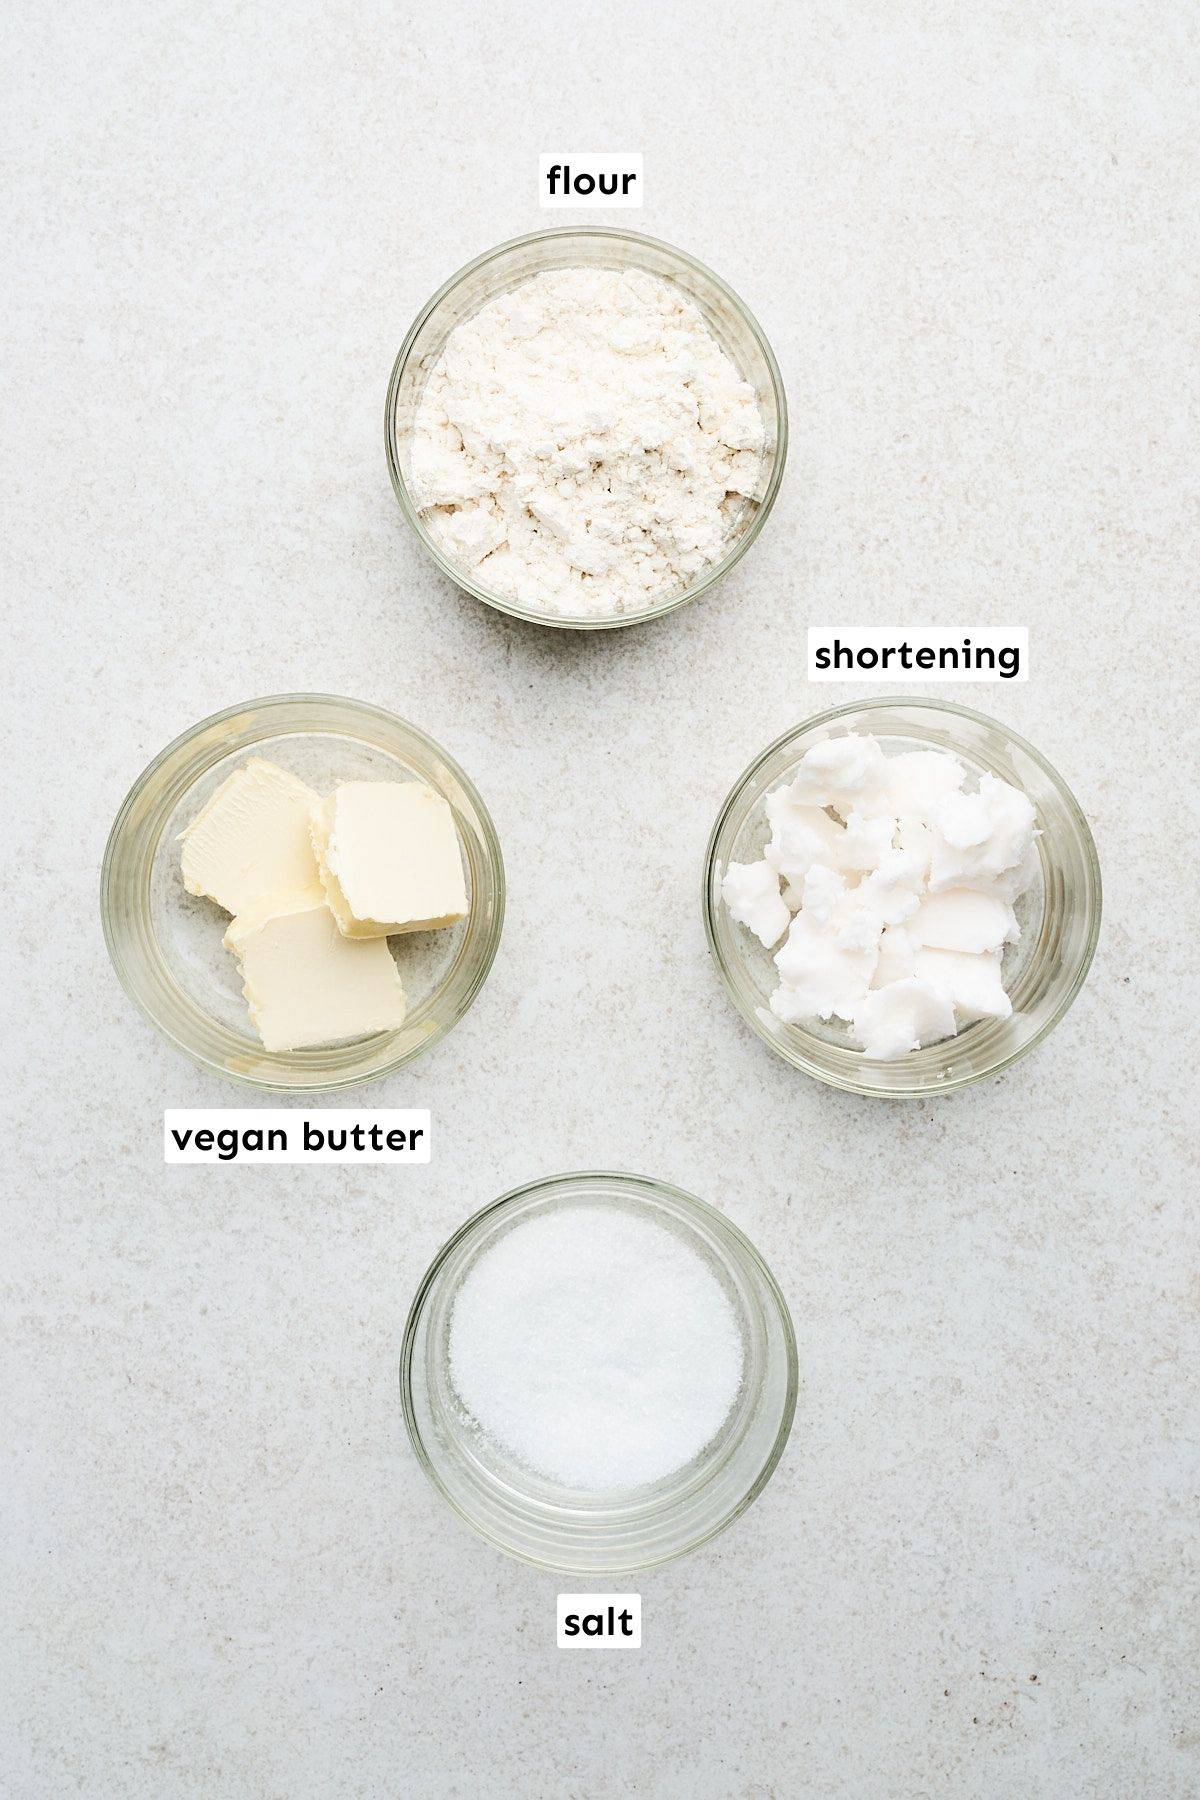
🛒 Ingredients & substitutions
- Flour: Use quality unbleached all-purpose flour, like from Arrowhead Mills, Hodgson Mill, King Arthur, or Bob’s Red Mill. You’re looking for a medium-protein content here, but you can even use a low-protein pastry flour for ultra-tender results.
- Salt: Enhances the other pie crust ingredients, preventing a flat taste.
- Vegetable shortening: In our testing, we’ve found that a 3:1 ratio of vegetable shortening to vegan butter cubes works best. Alternatively, you can use all vegetable shortening, but we’d steer clear of making an all-butter vegan pie crust.
- Ice water: To bring the dough together. We can’t stress enough how important it is that your water be ice-cold to prevent the fat from melting. The unmelted pieces of fat create little pockets that melt as the crust bakes, resulting in the flaky layers that everyone loves.
For a complete ingredient list and step-by-step guide, scroll down to our recipe card.
📝 How to make vegan pie crust
A flaky, buttery pie crust is the foundation of many classic desserts, and this vegan version ensures everyone can enjoy a slice! Let’s walk through the steps together.
Step 1: Prepare the dough
Begin by adding about ¾ of the flour and salt to your food processor. Give it 2-3 quick pulses to mix. Drop in your cubed shortening and/or vegan butter and pulse away.
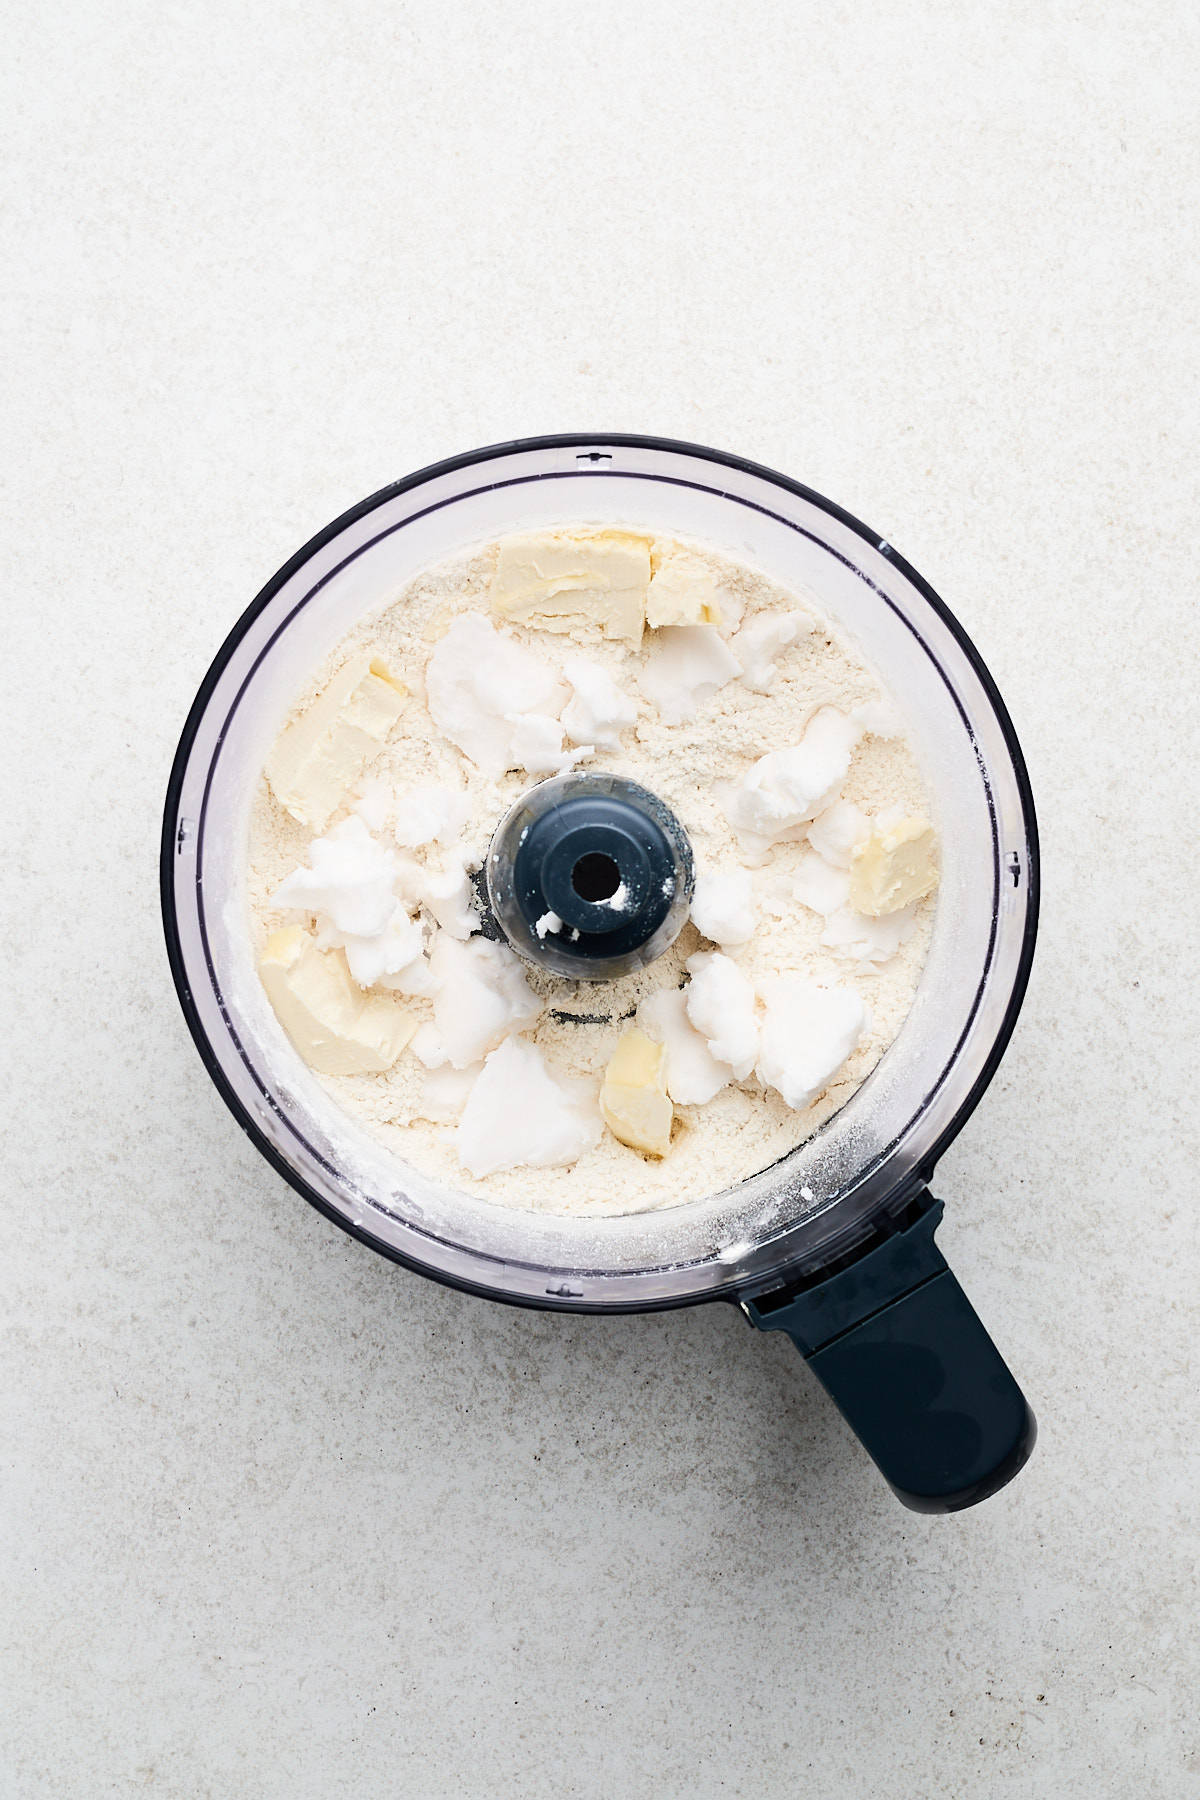
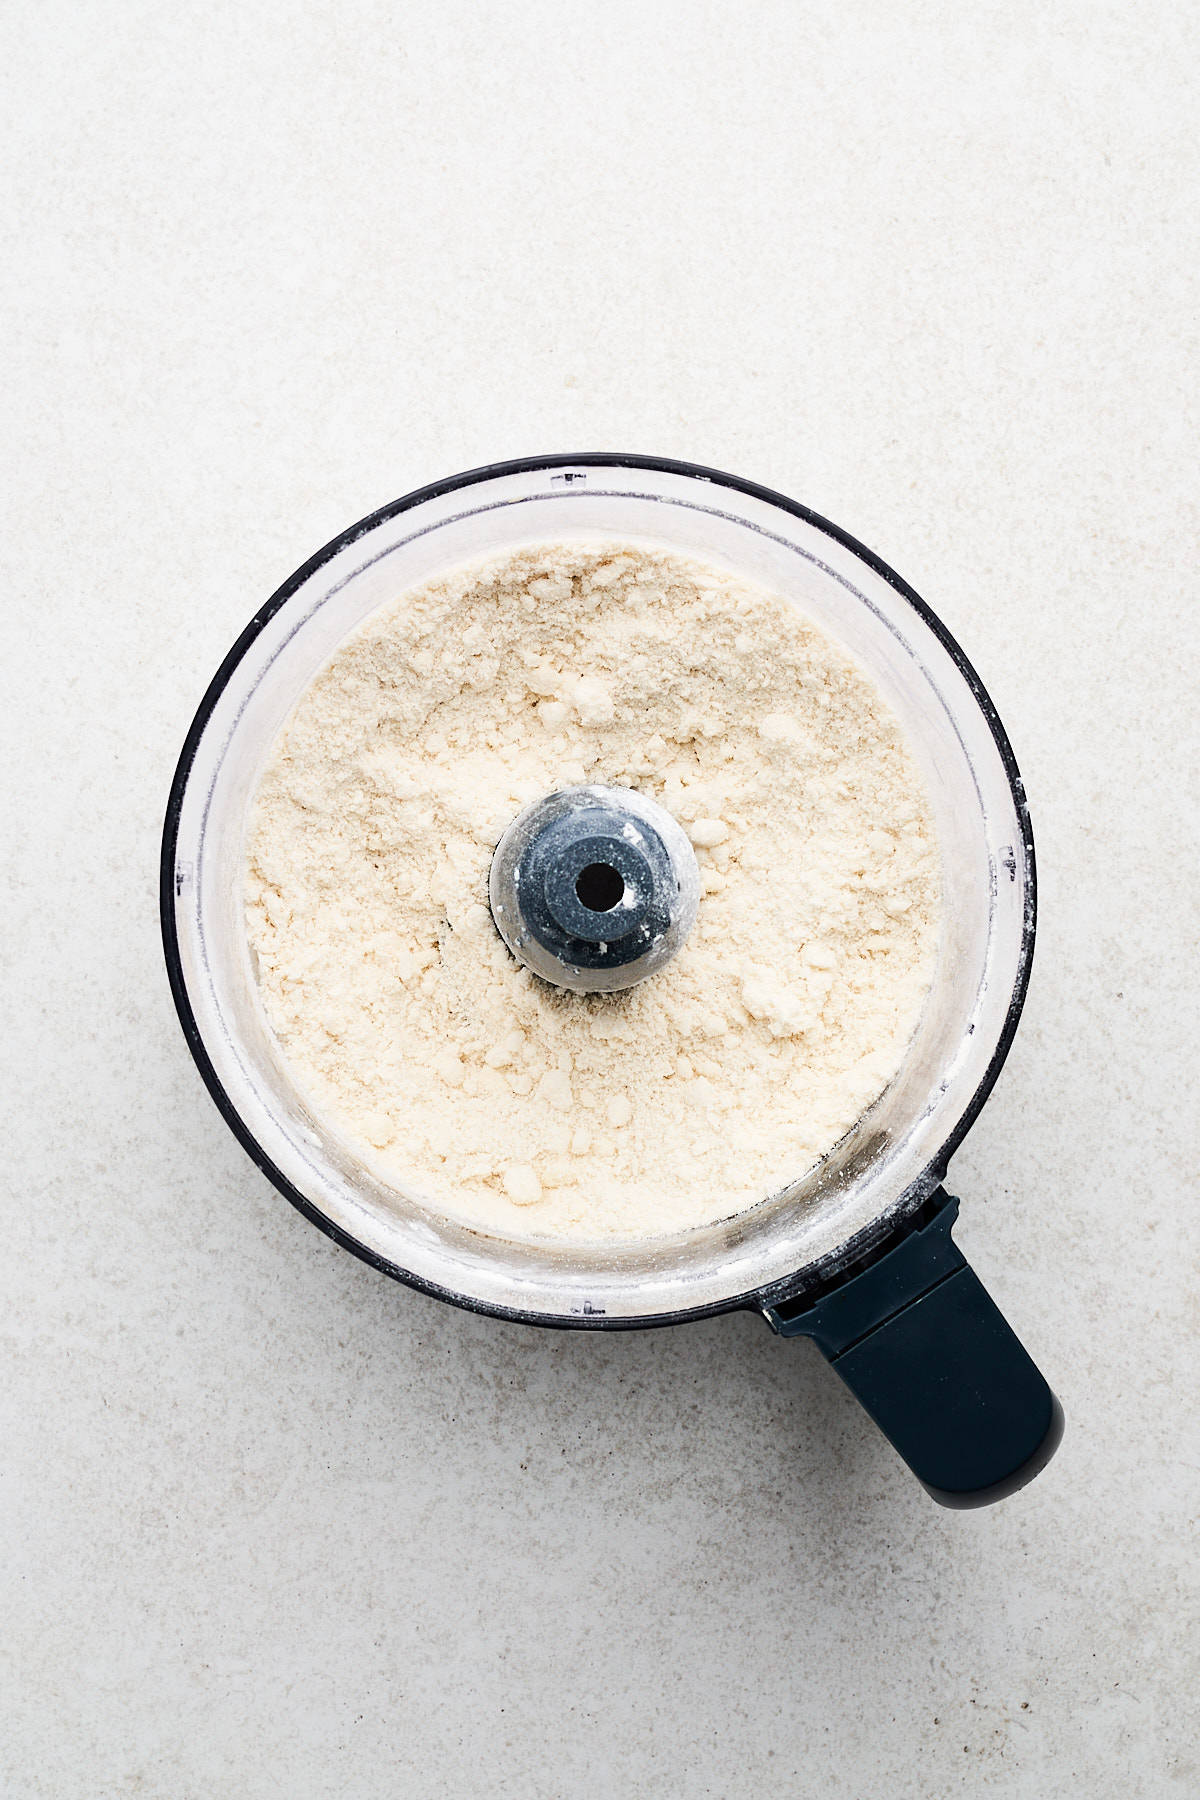
After about 20-25 pulses, no dry flour should remain, and the dough will begin to form clumps. Scrape the dough from the sides, add the remaining flour, and pulse until just incorporated.
Note: If you’re working without a food processor, simply whisk the flour and salt in a mixing bowl. Using a pastry cutter or two forks, blend in the shortening until the mix resembles pea-sized granules.
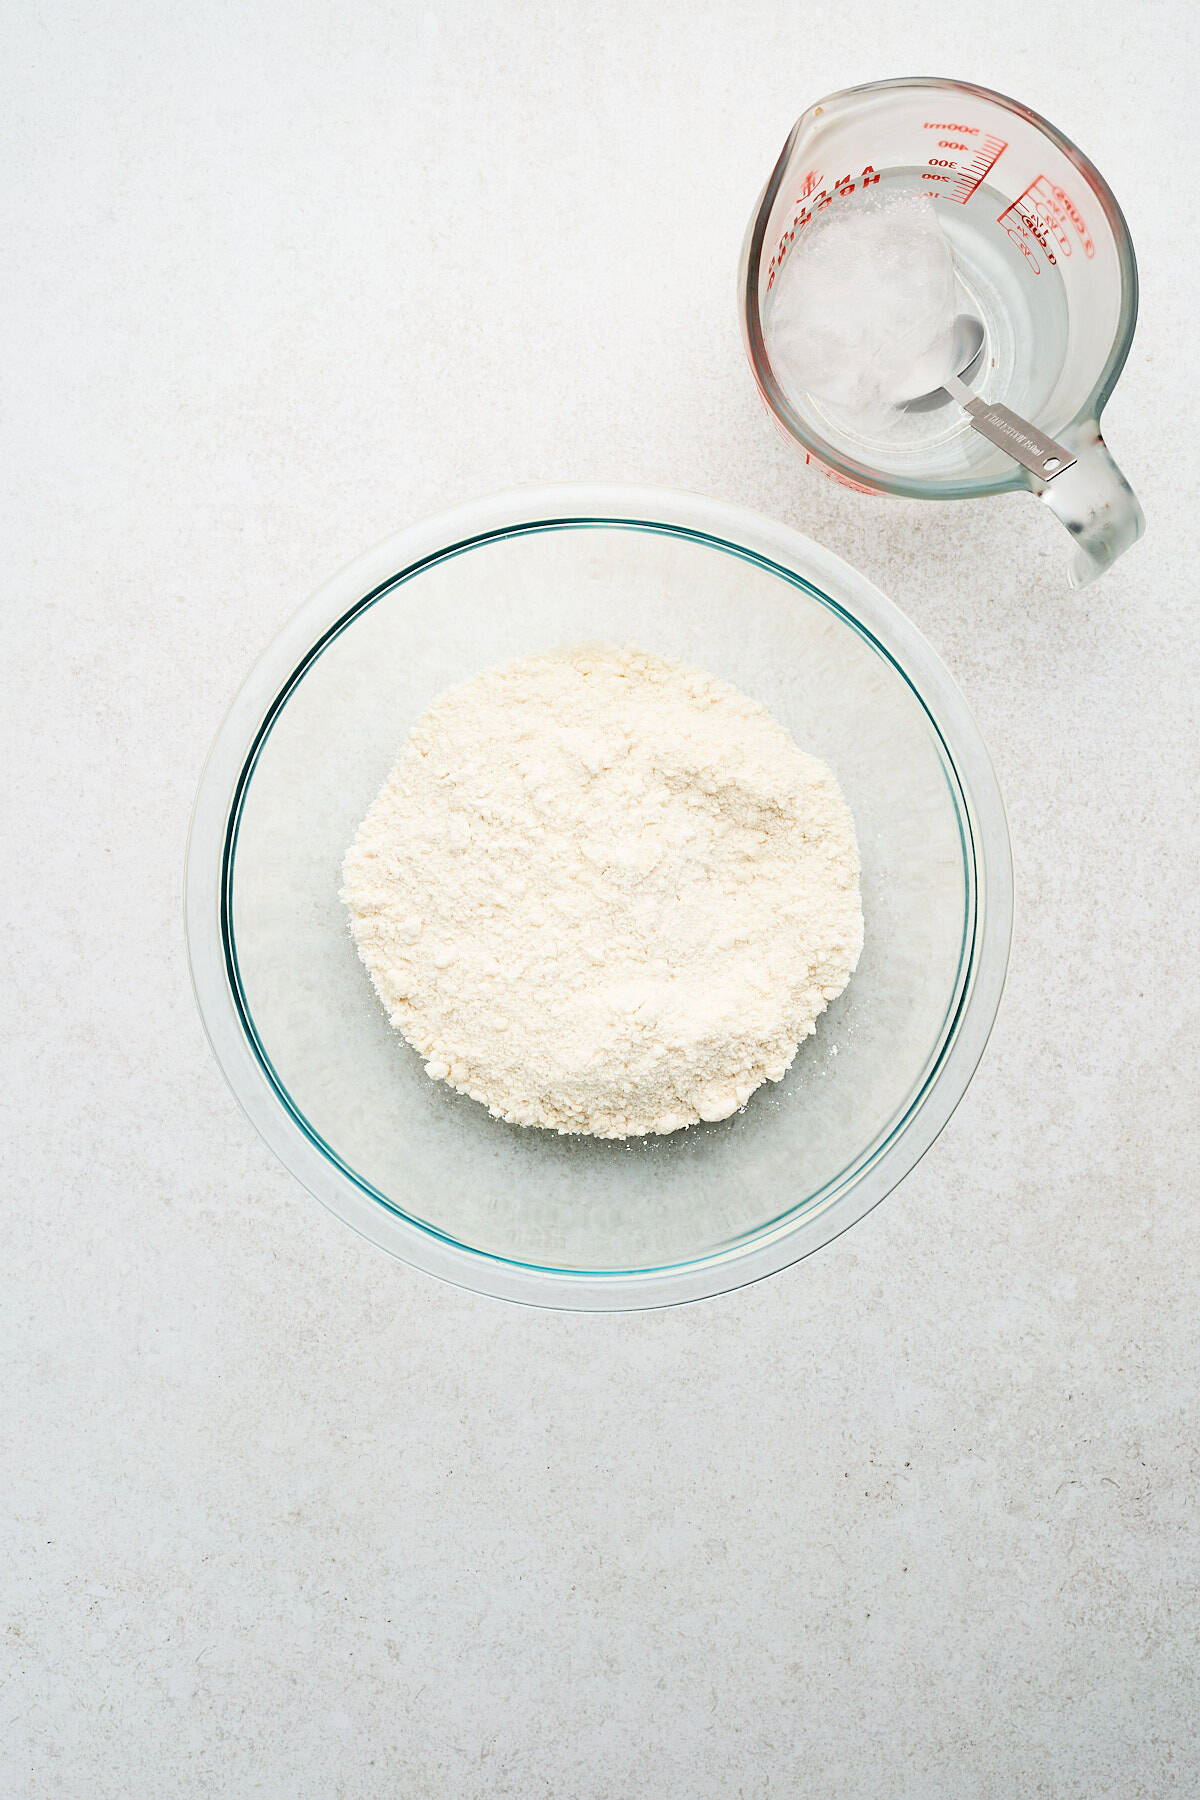
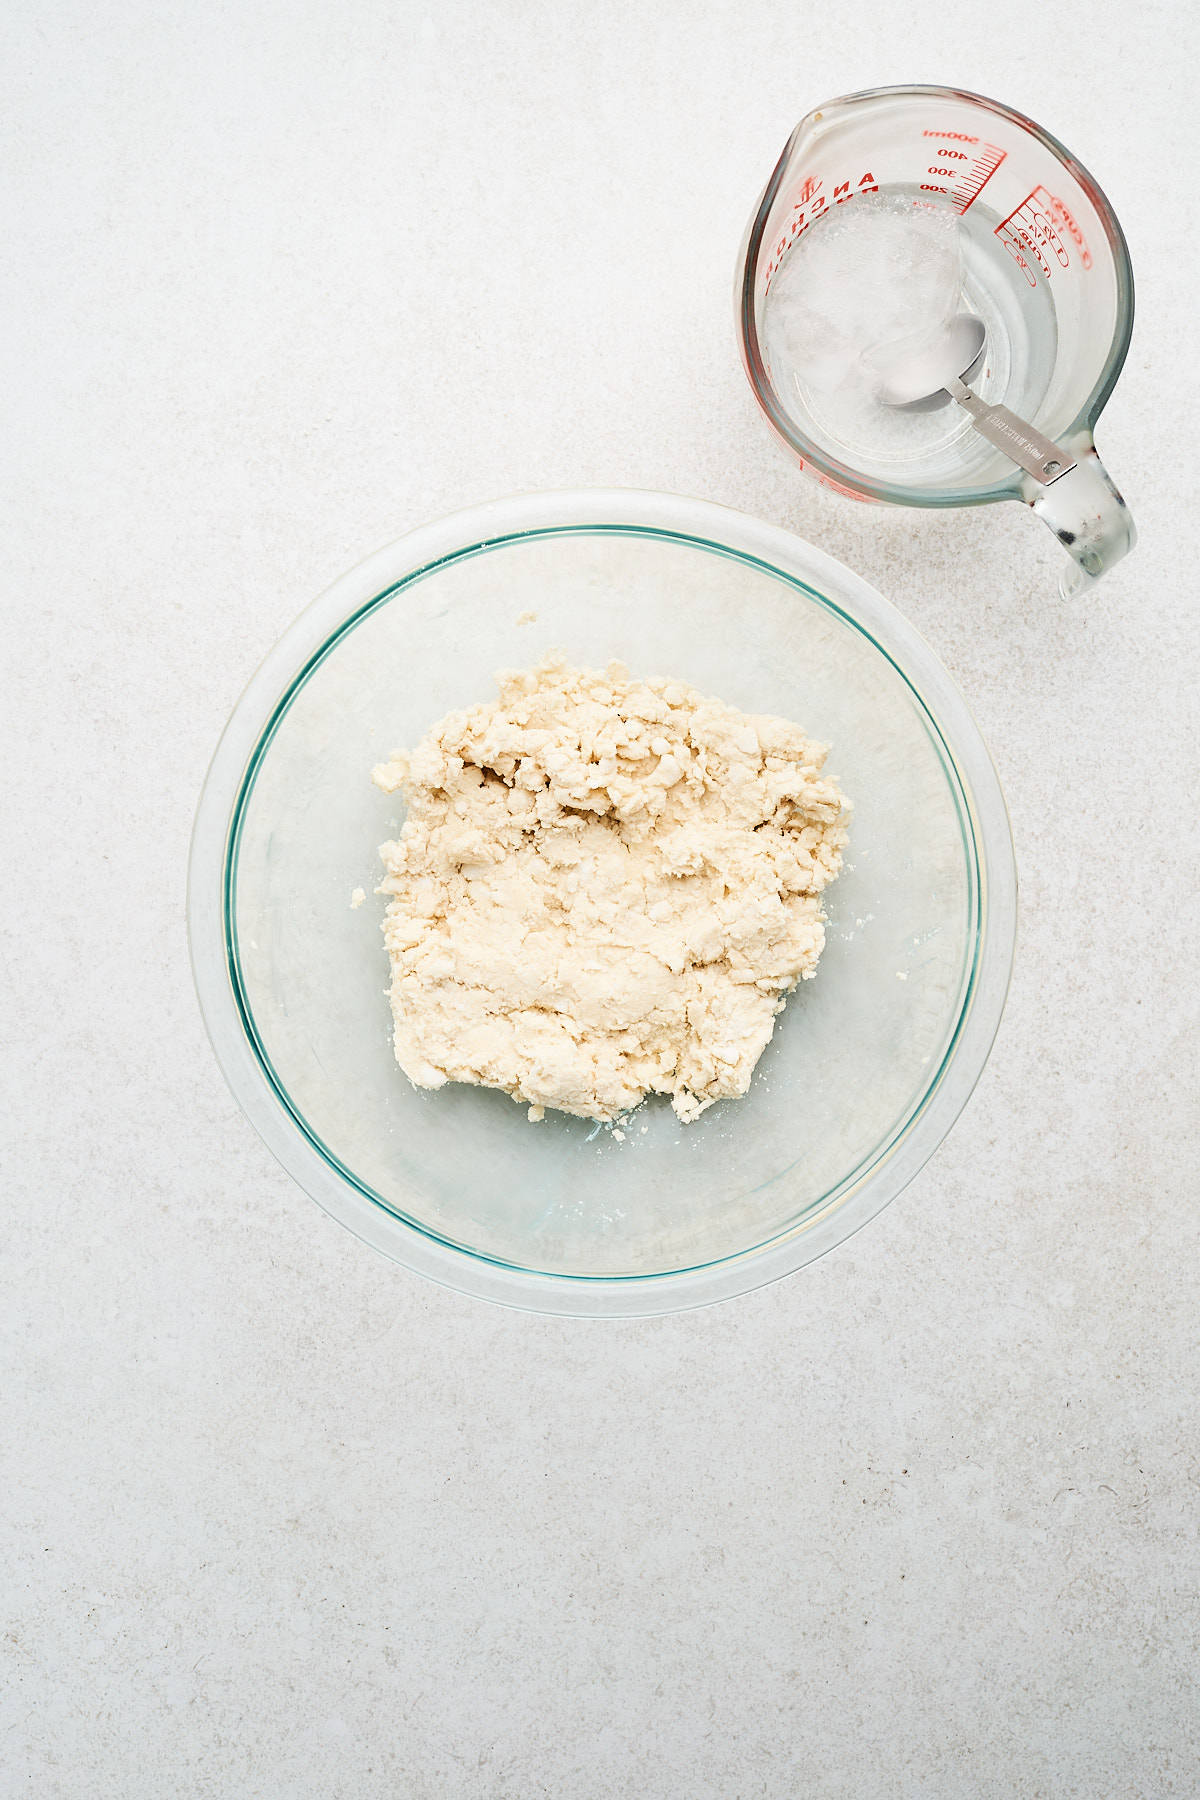
Step 2: Hydrate the dough
Transfer the dough blend to a bowl, then add 3 tablespoons of ice-cold water and gently fold it in. Use a spatula to press the dough until it sticks together, adding more water little by little as necessary. When you squeeze a handful, it should barely cling together.
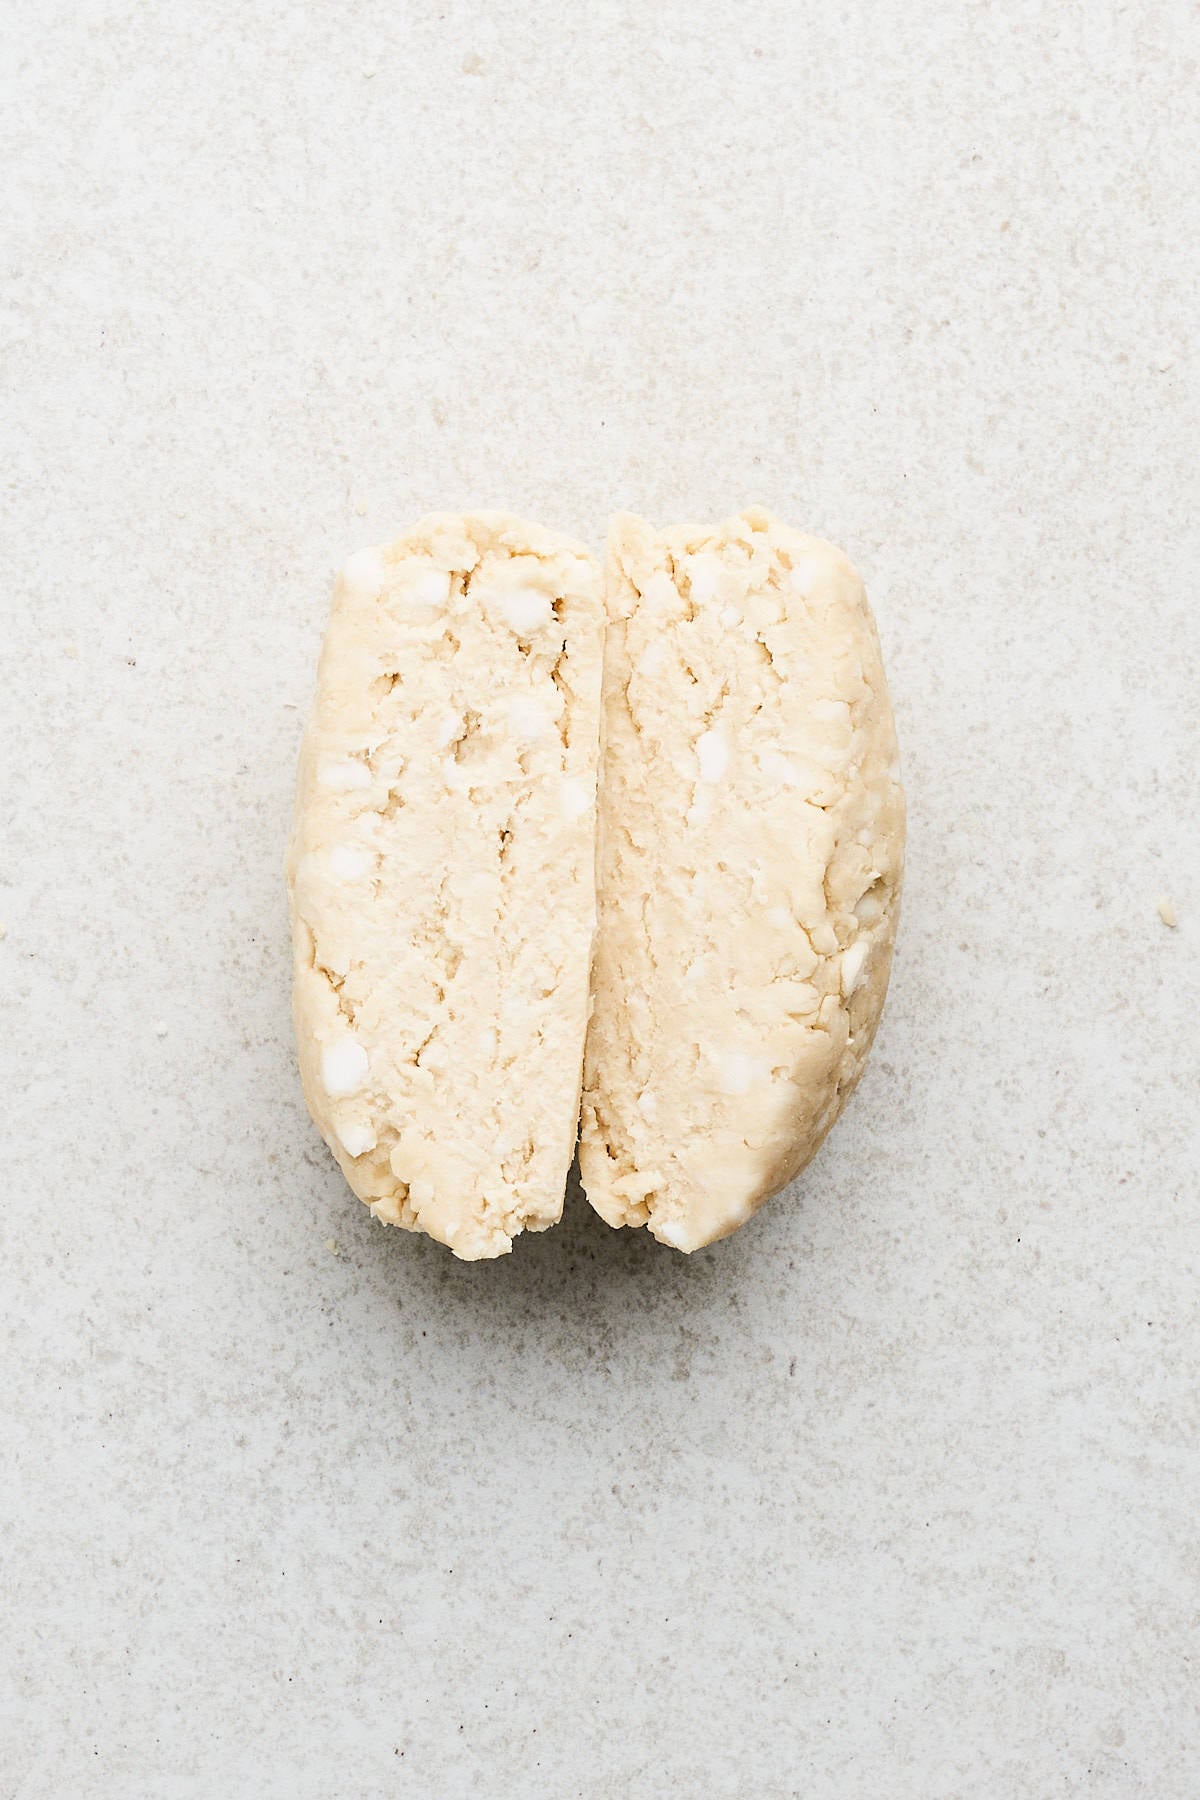
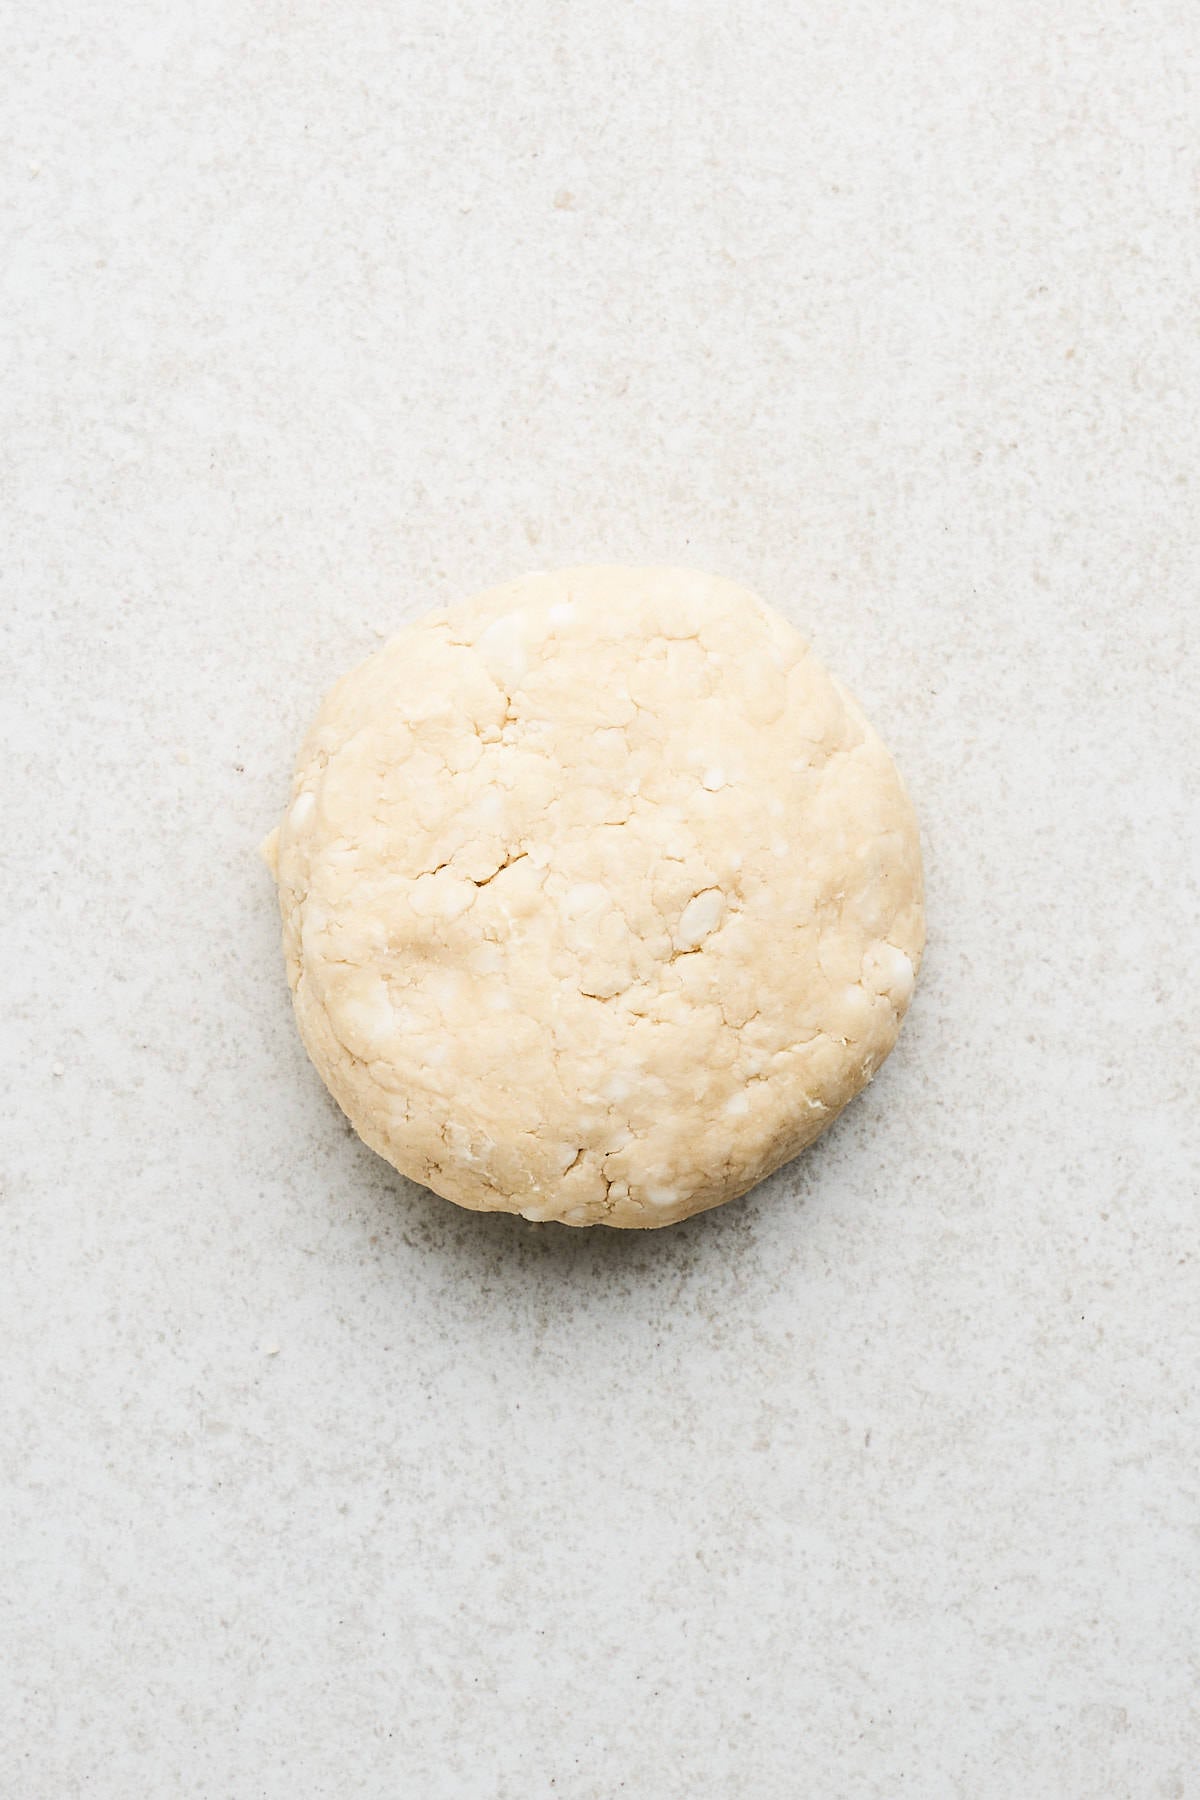
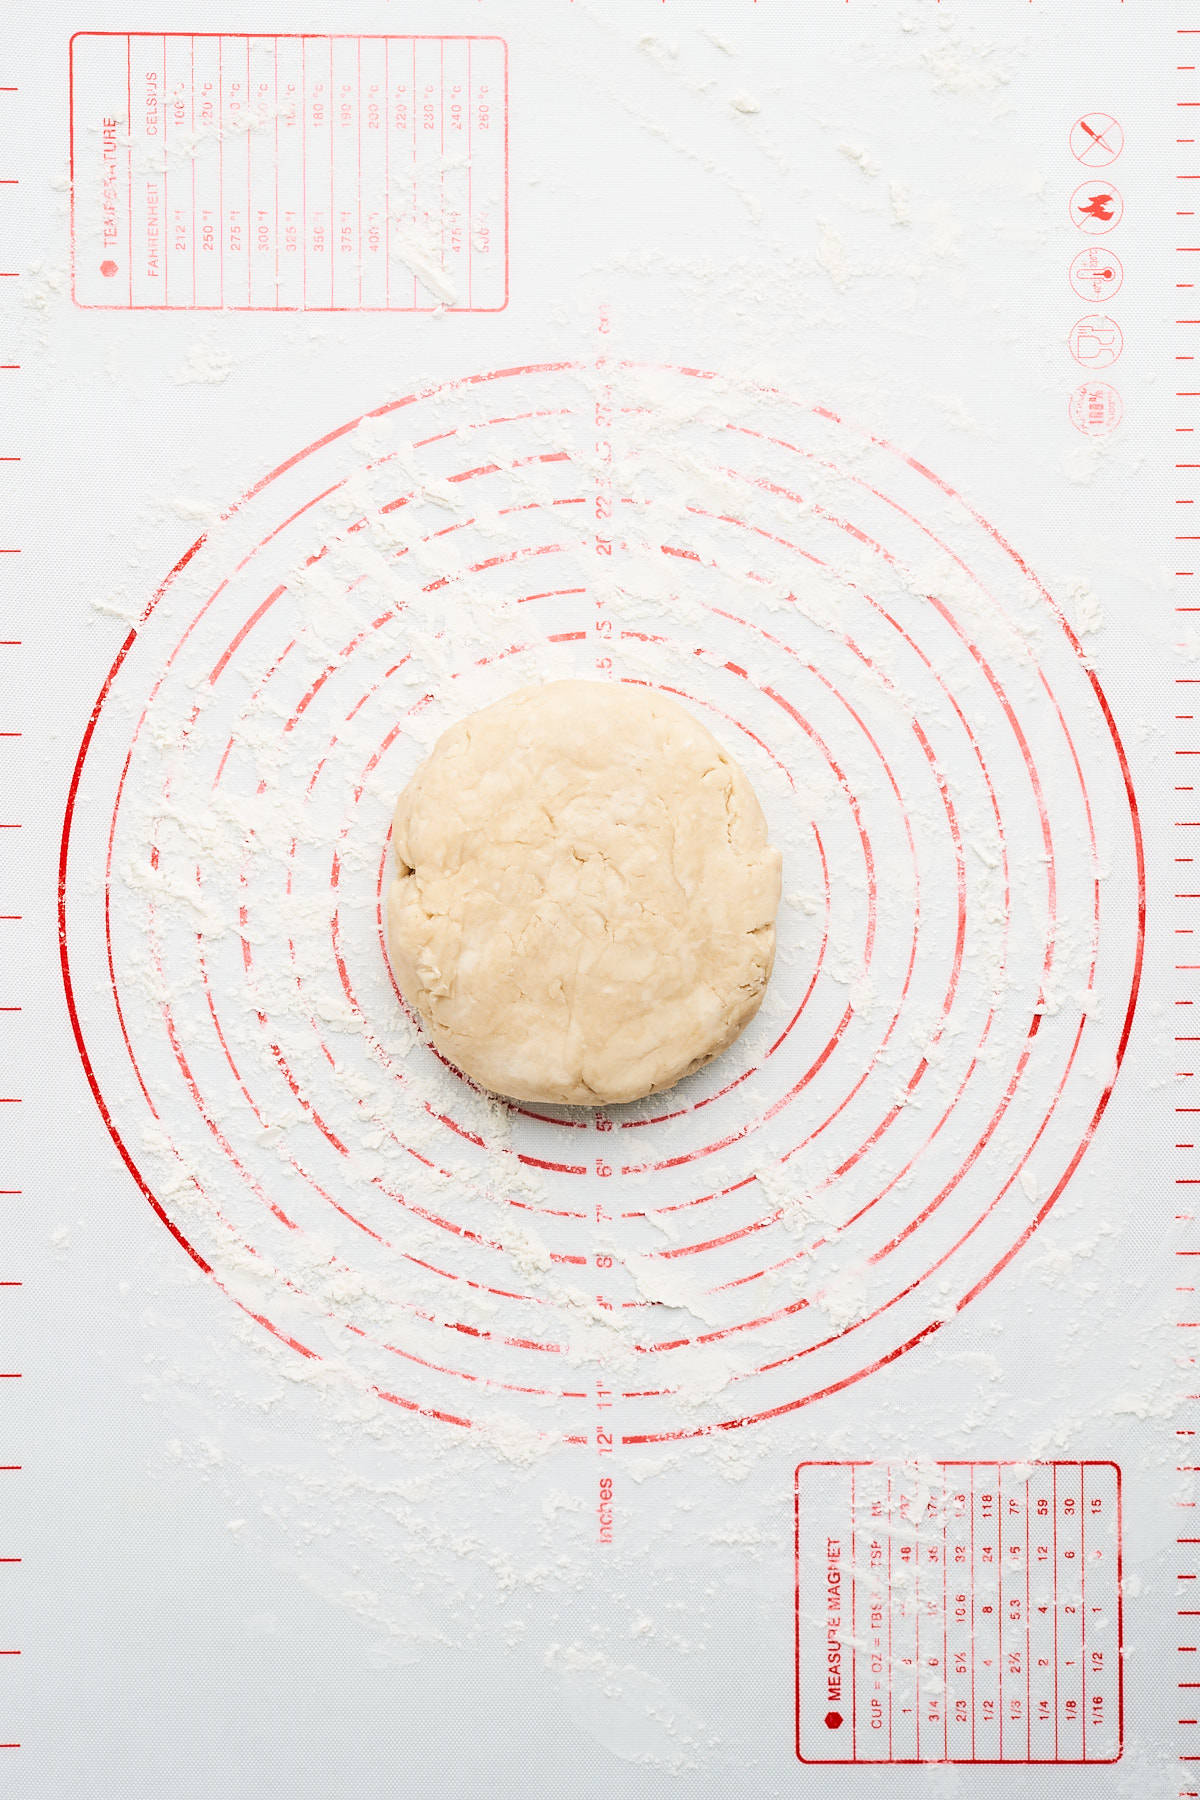
Step 3: Chill the dough
Gently form the dough into a disc and wrap it securely in cling wrap. Transfer this to the fridge and allow it to chill to hydrate the flour. You can leave it for as little as 30 minutes, but we strongly suggest at least 2 hours or even overnight.
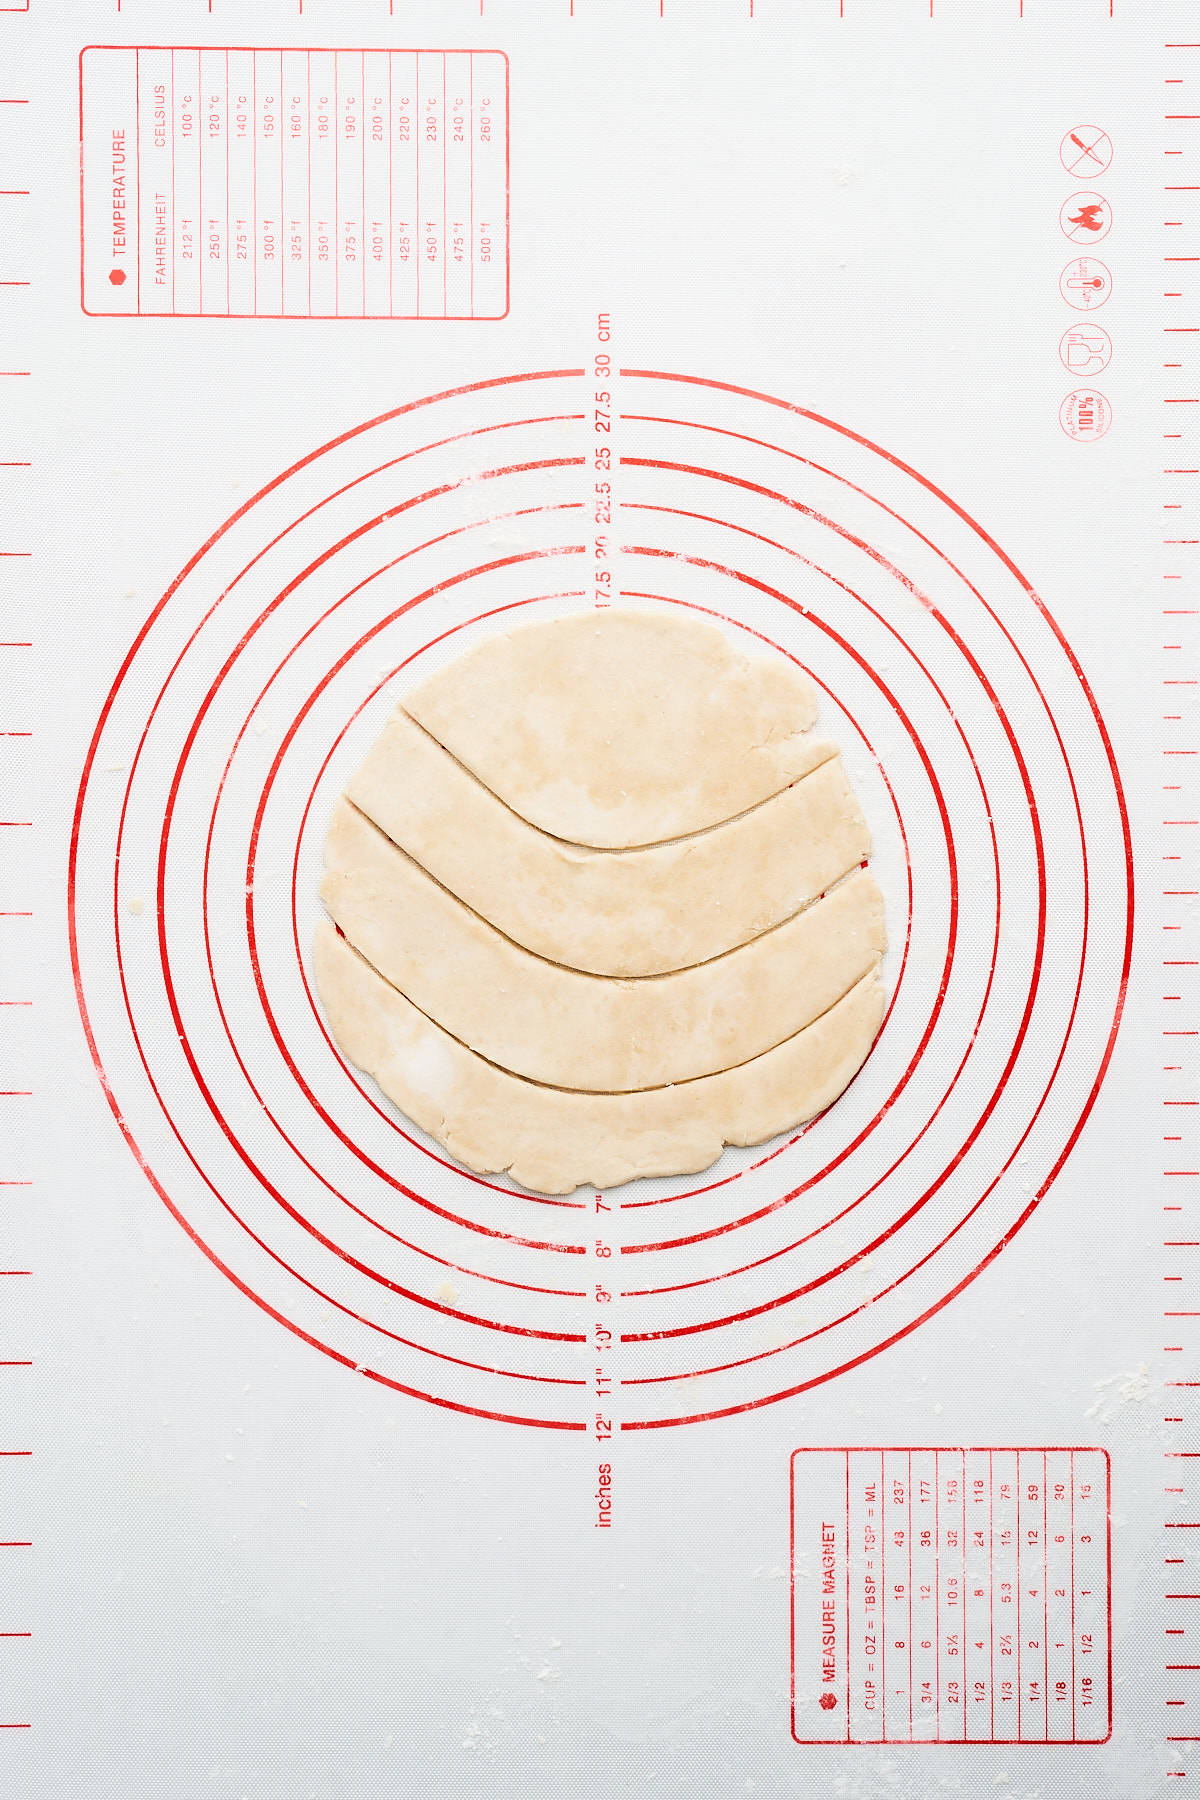
Step 4: Roll the dough
If your dough has chilled for over an hour, let it sit out for about 10 minutes. This makes rolling easier and ensures it doesn’t crack. Roll the disc out gently on a floured working surface and with a floured rolling pin.
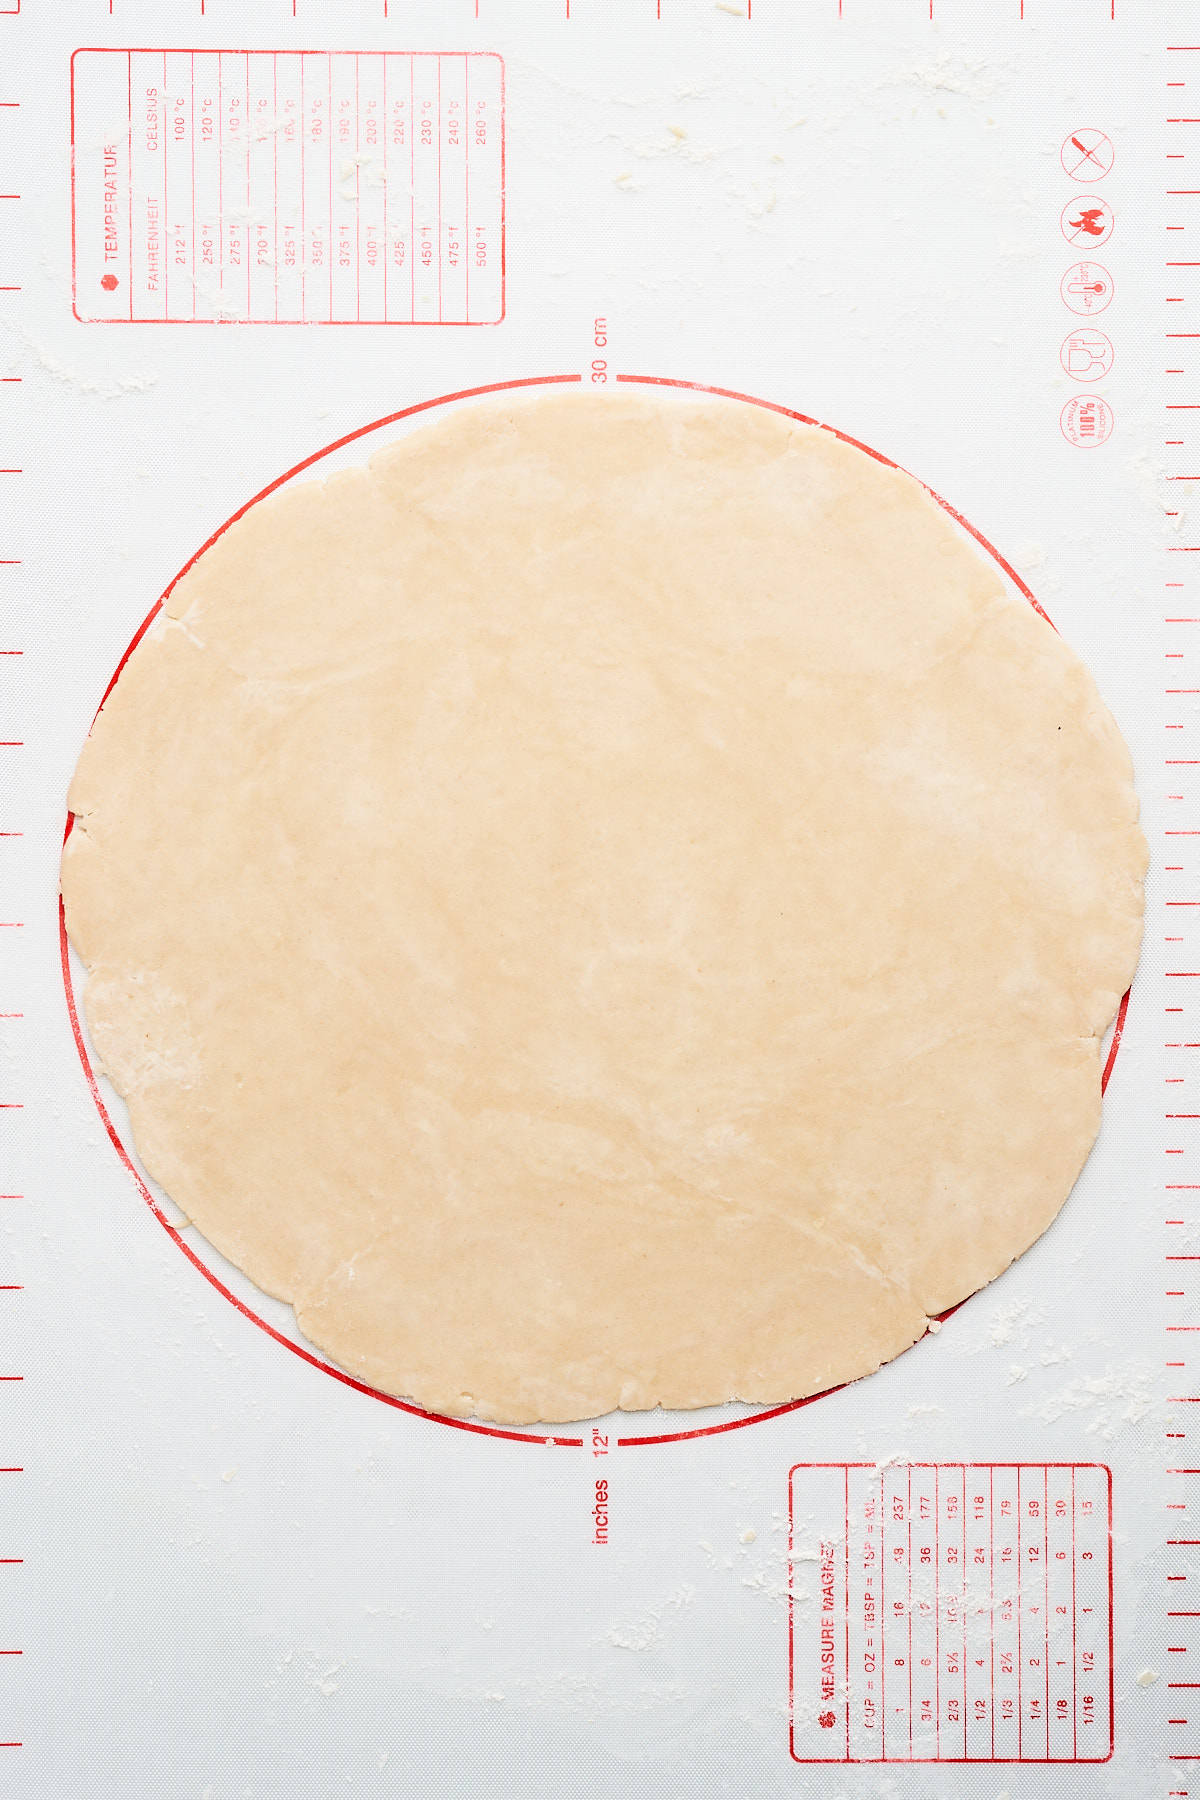
Remember to pick it up and rotate it as you roll for an even circle. Roll it out to a size approximately 2-3 inches larger than your pan, which helps account for the sides and gives you a little leeway for decorative edges.
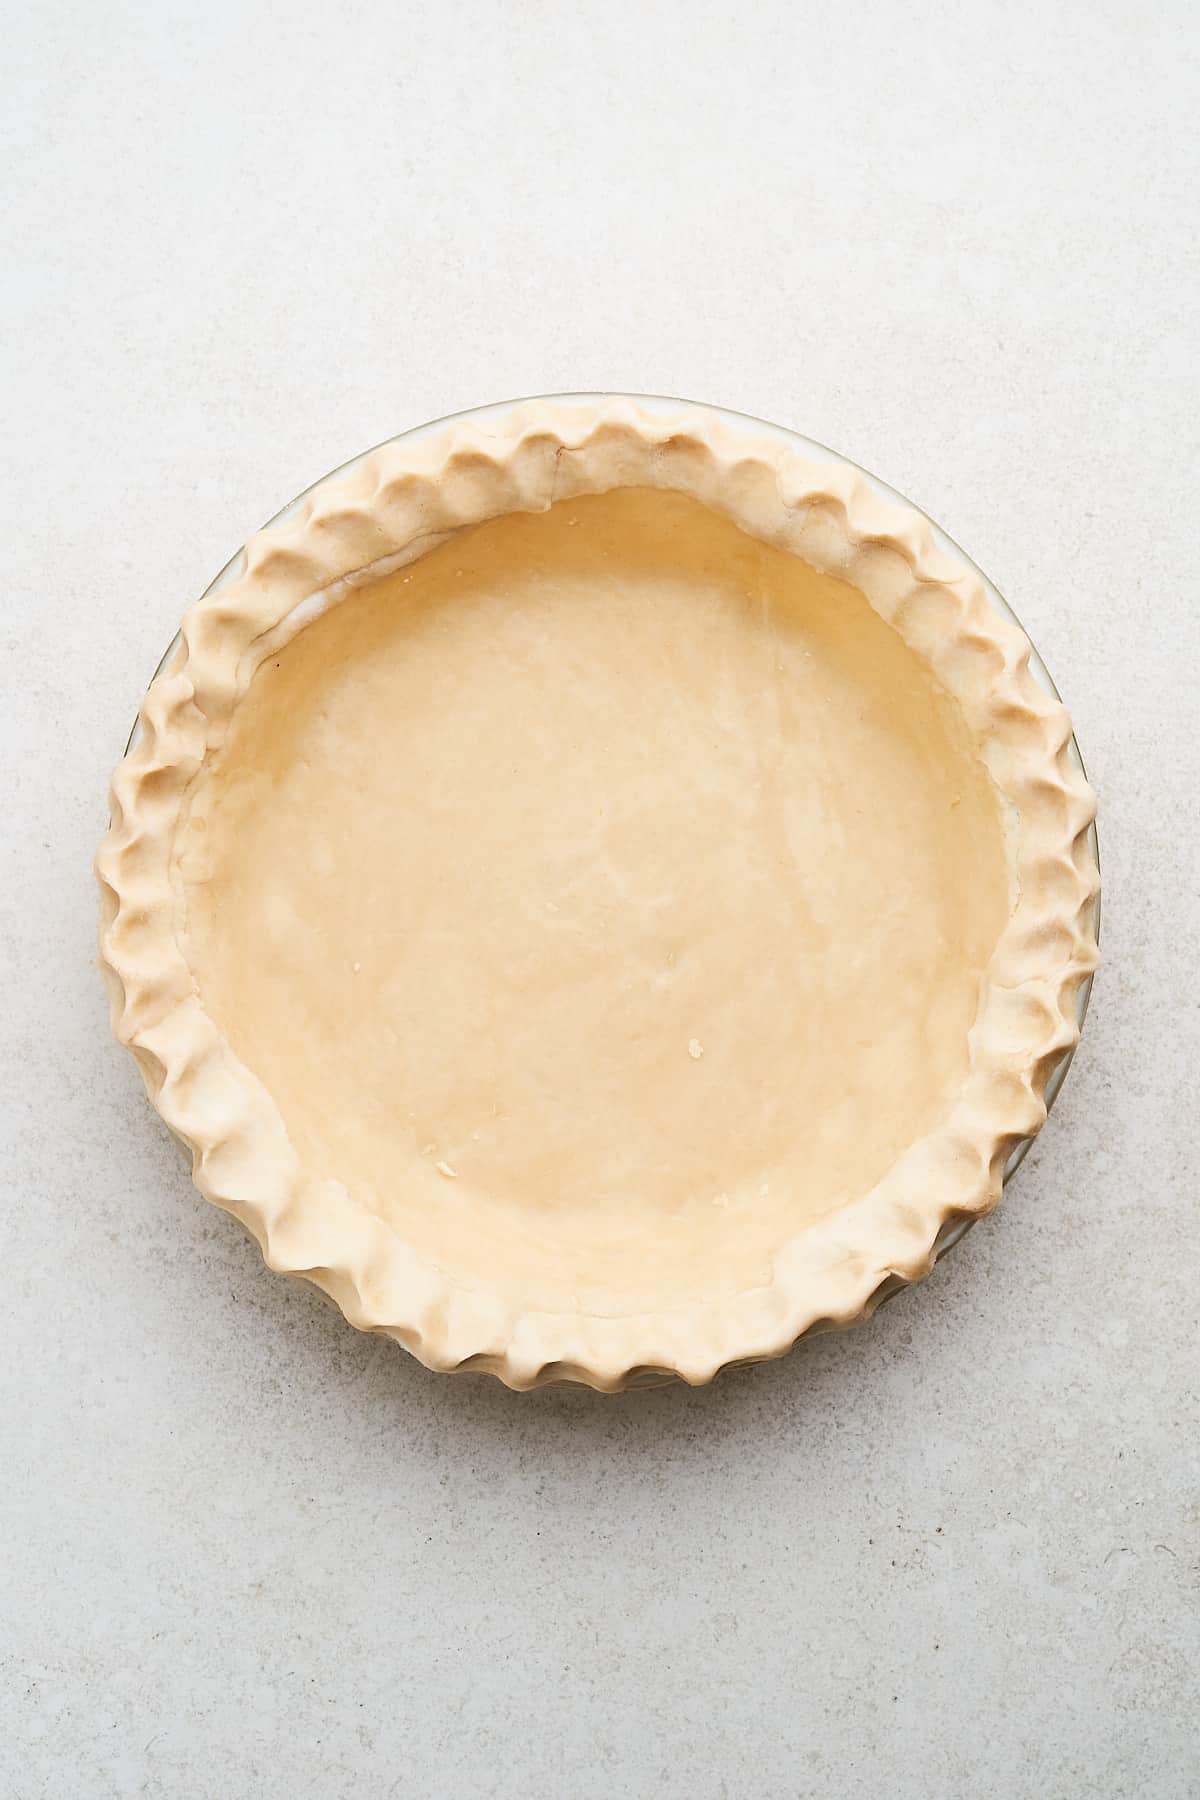
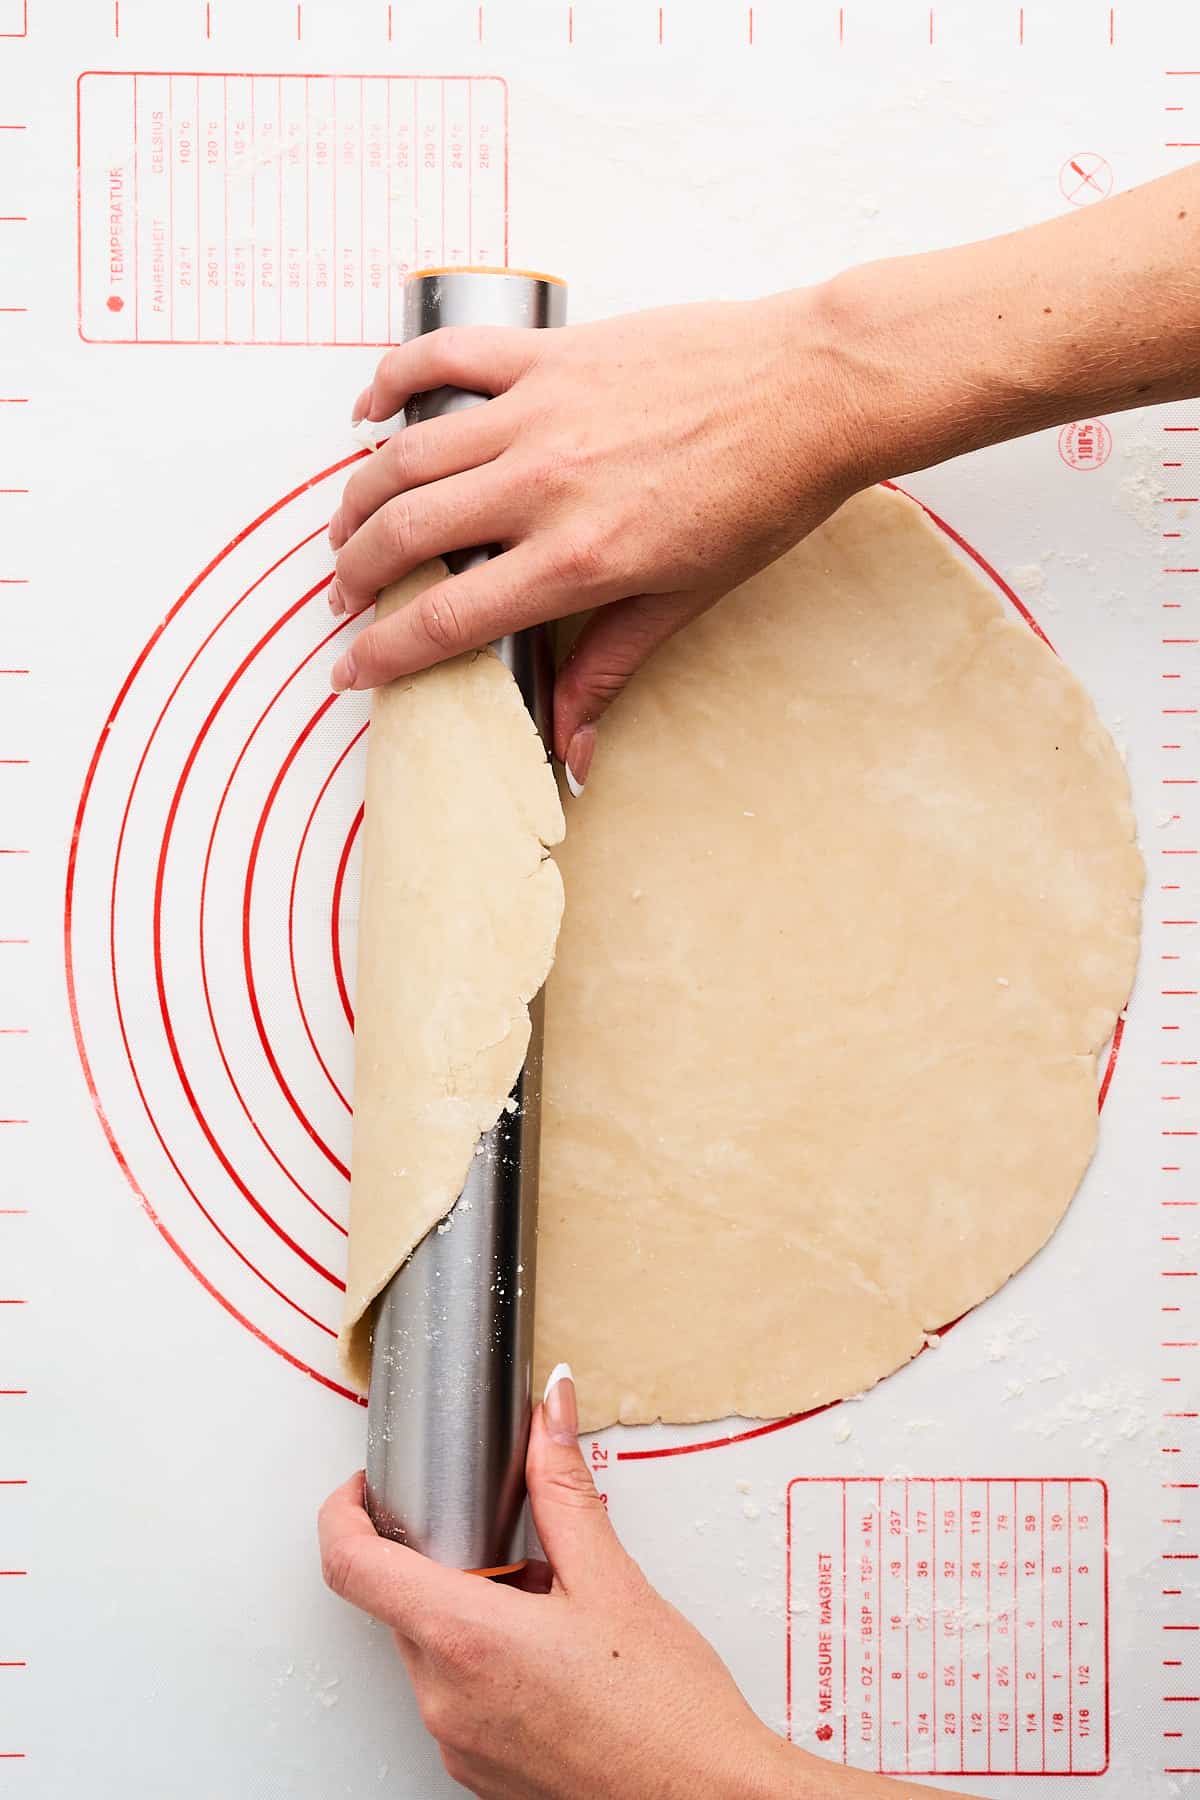
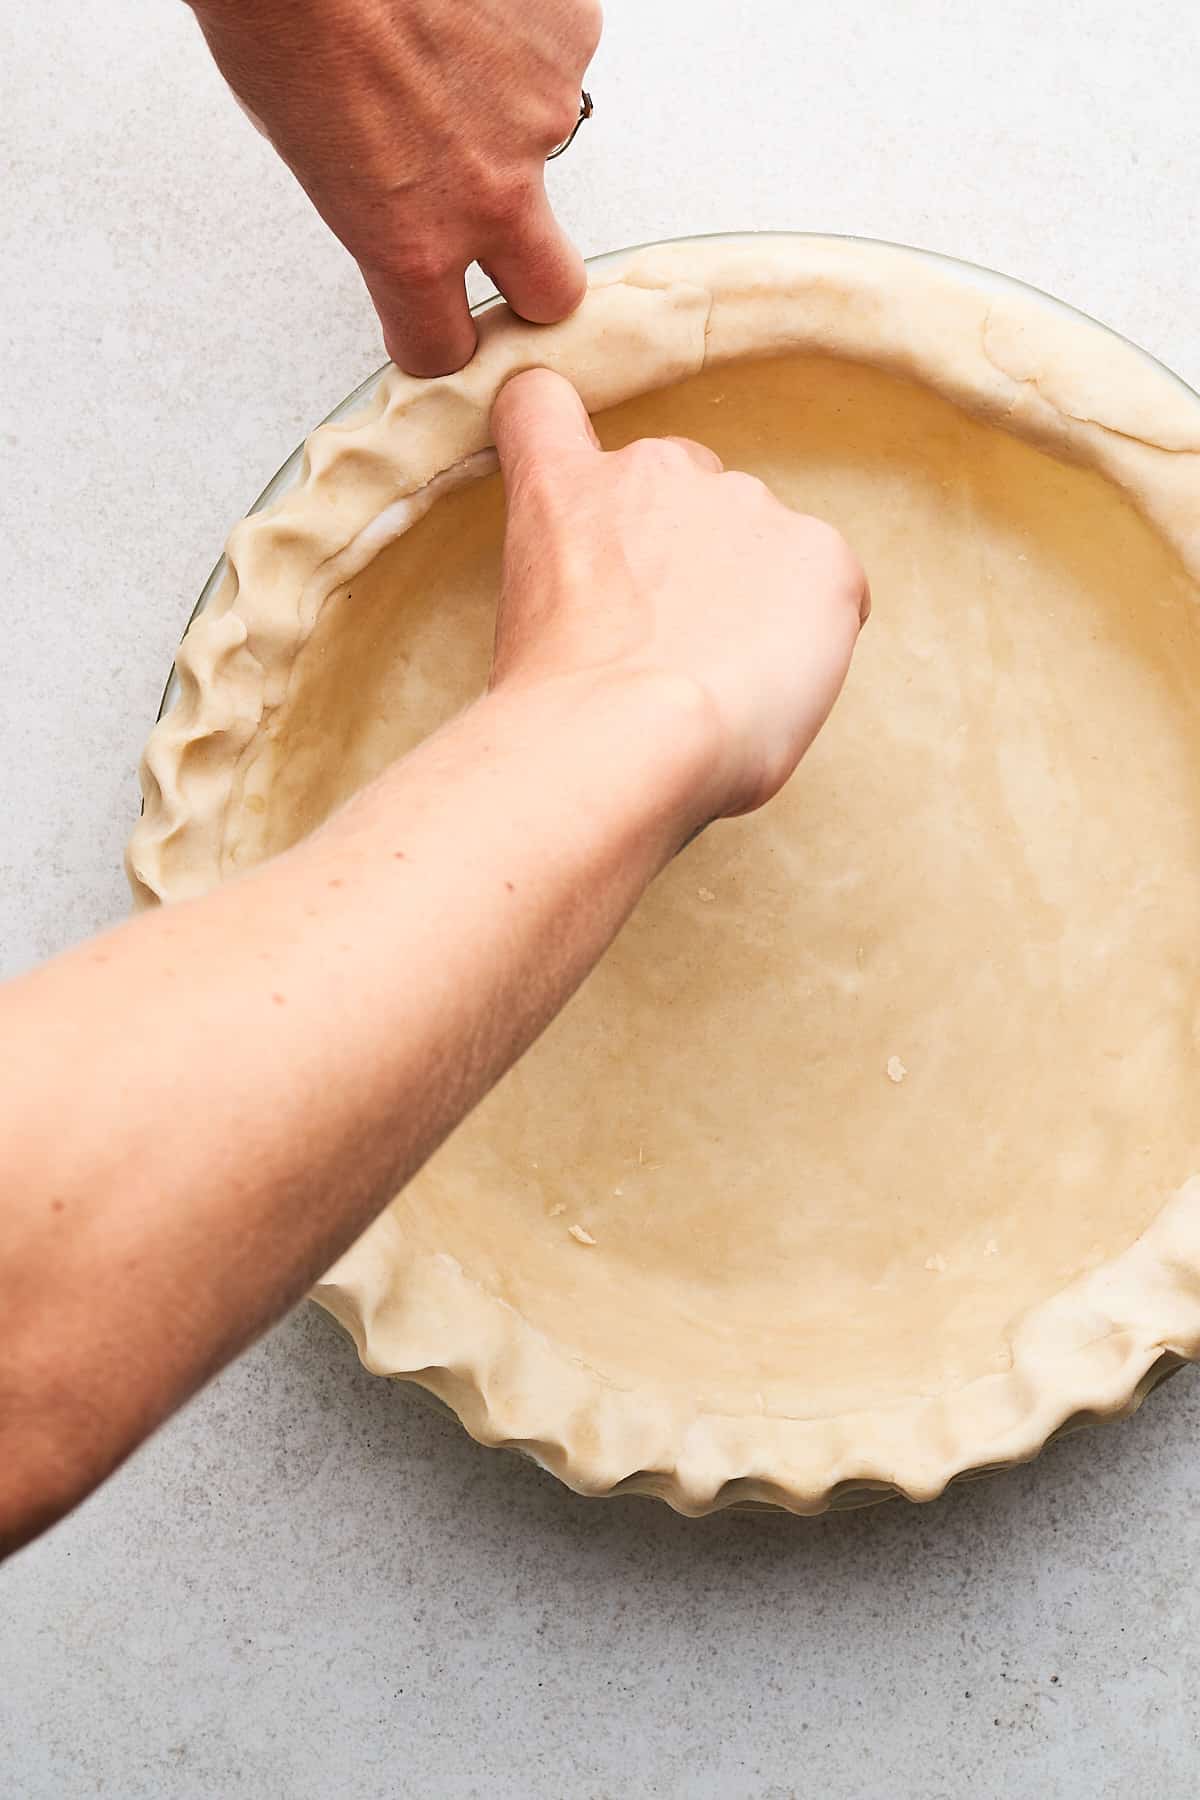
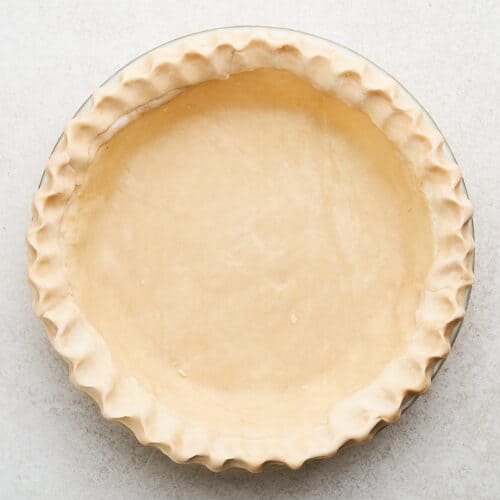
Step 5: Form the crust
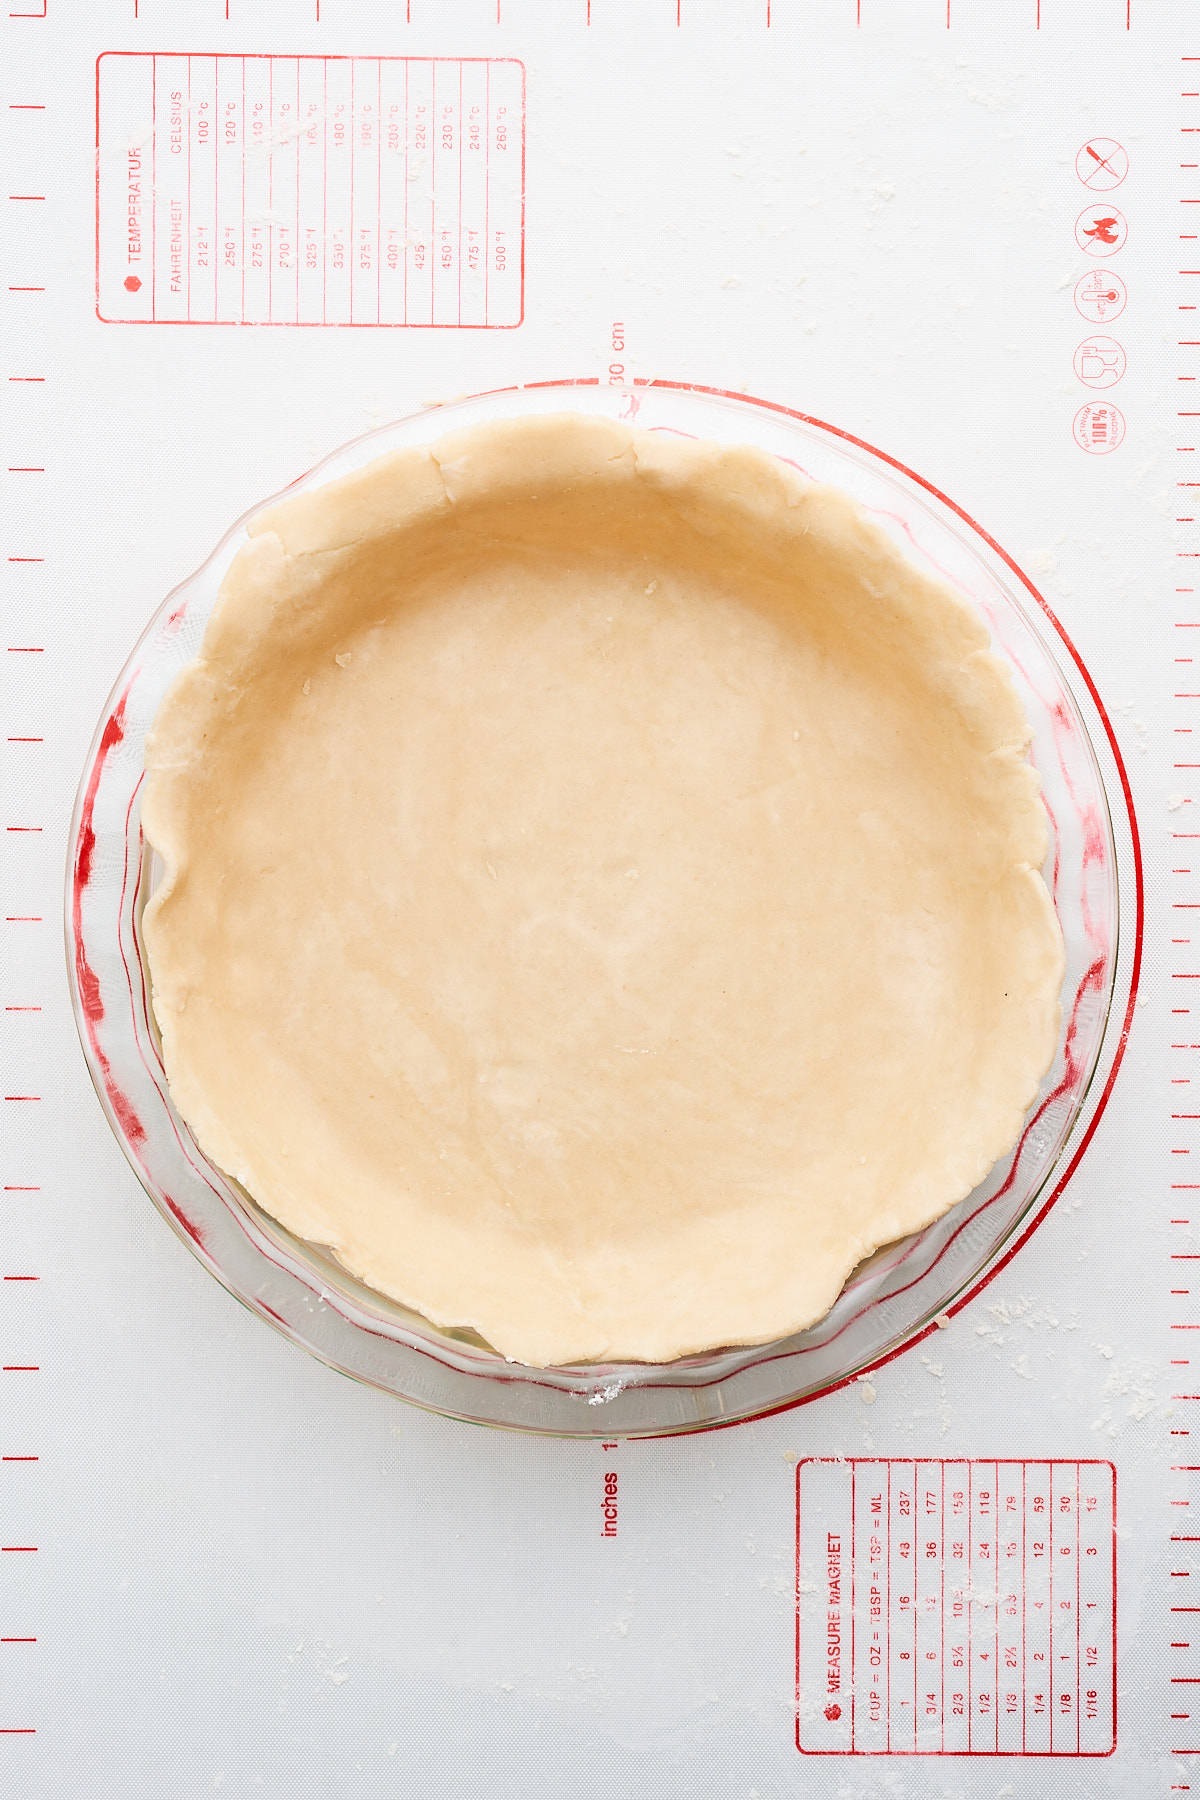
Carefully pick up the crust by rolling it around your rolling pin, then unroll it over your pie dish. Gently press down on the edges, ensuring a snug fit. Trim or fold the excess over and crimp the edges in your preferred style.
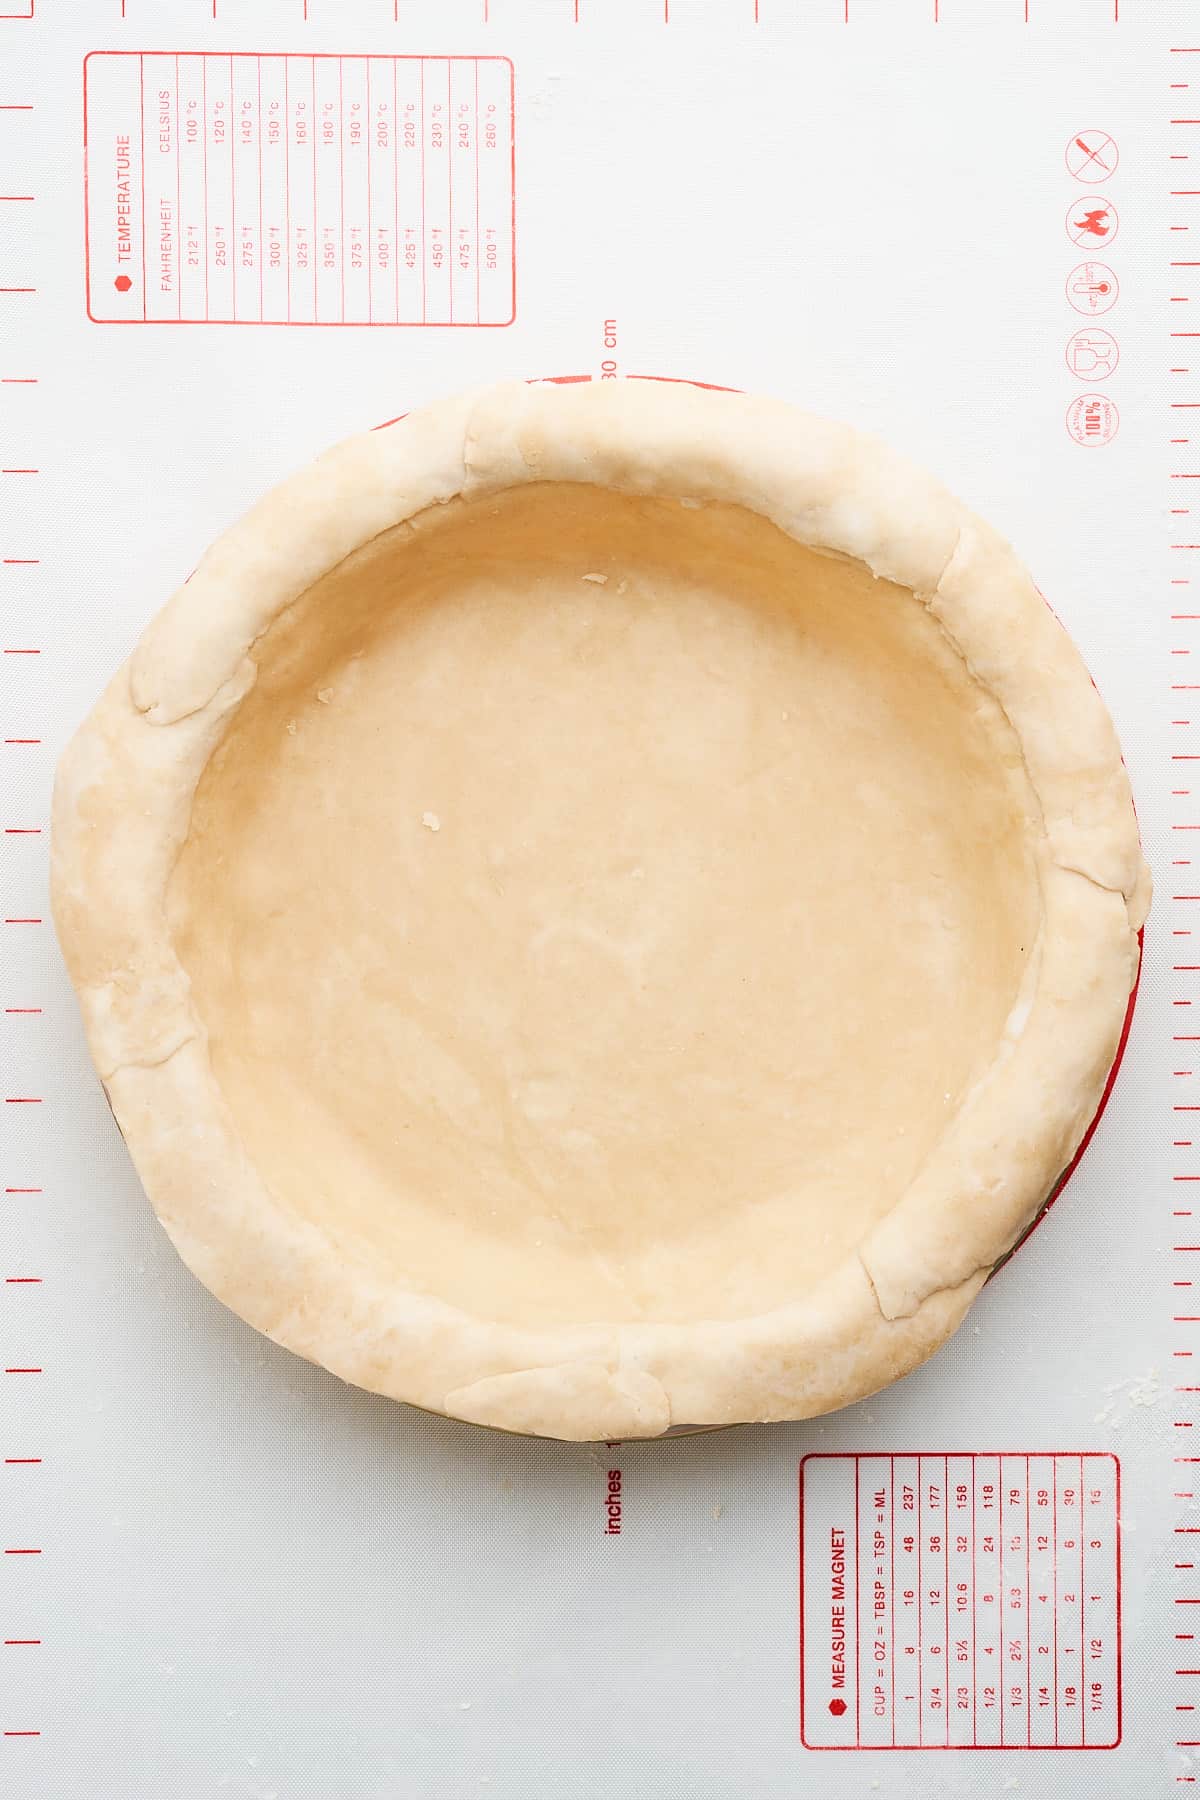
For a thicker crust, you can make an extra vegan pie crust and roll out a small portion of it to create strips. Arrange the strips on top of the edges and work them in using your fingers.
Step 6: final chill
After you’ve shaped the crust in its dish, place it back in the fridge for another 30 minutes. This firms up the fat and helps maintain the crust’s shape during baking. As you may be able to tell, the key to flaky pie crust is keeping it cold throughout the process!
♨️ How to blind bake vegan pie crust
If your pie recipe calls for a partially or fully pre-baked crust, you’ll need to blind-bake it (bake it without any filling). Here’s how to do it:
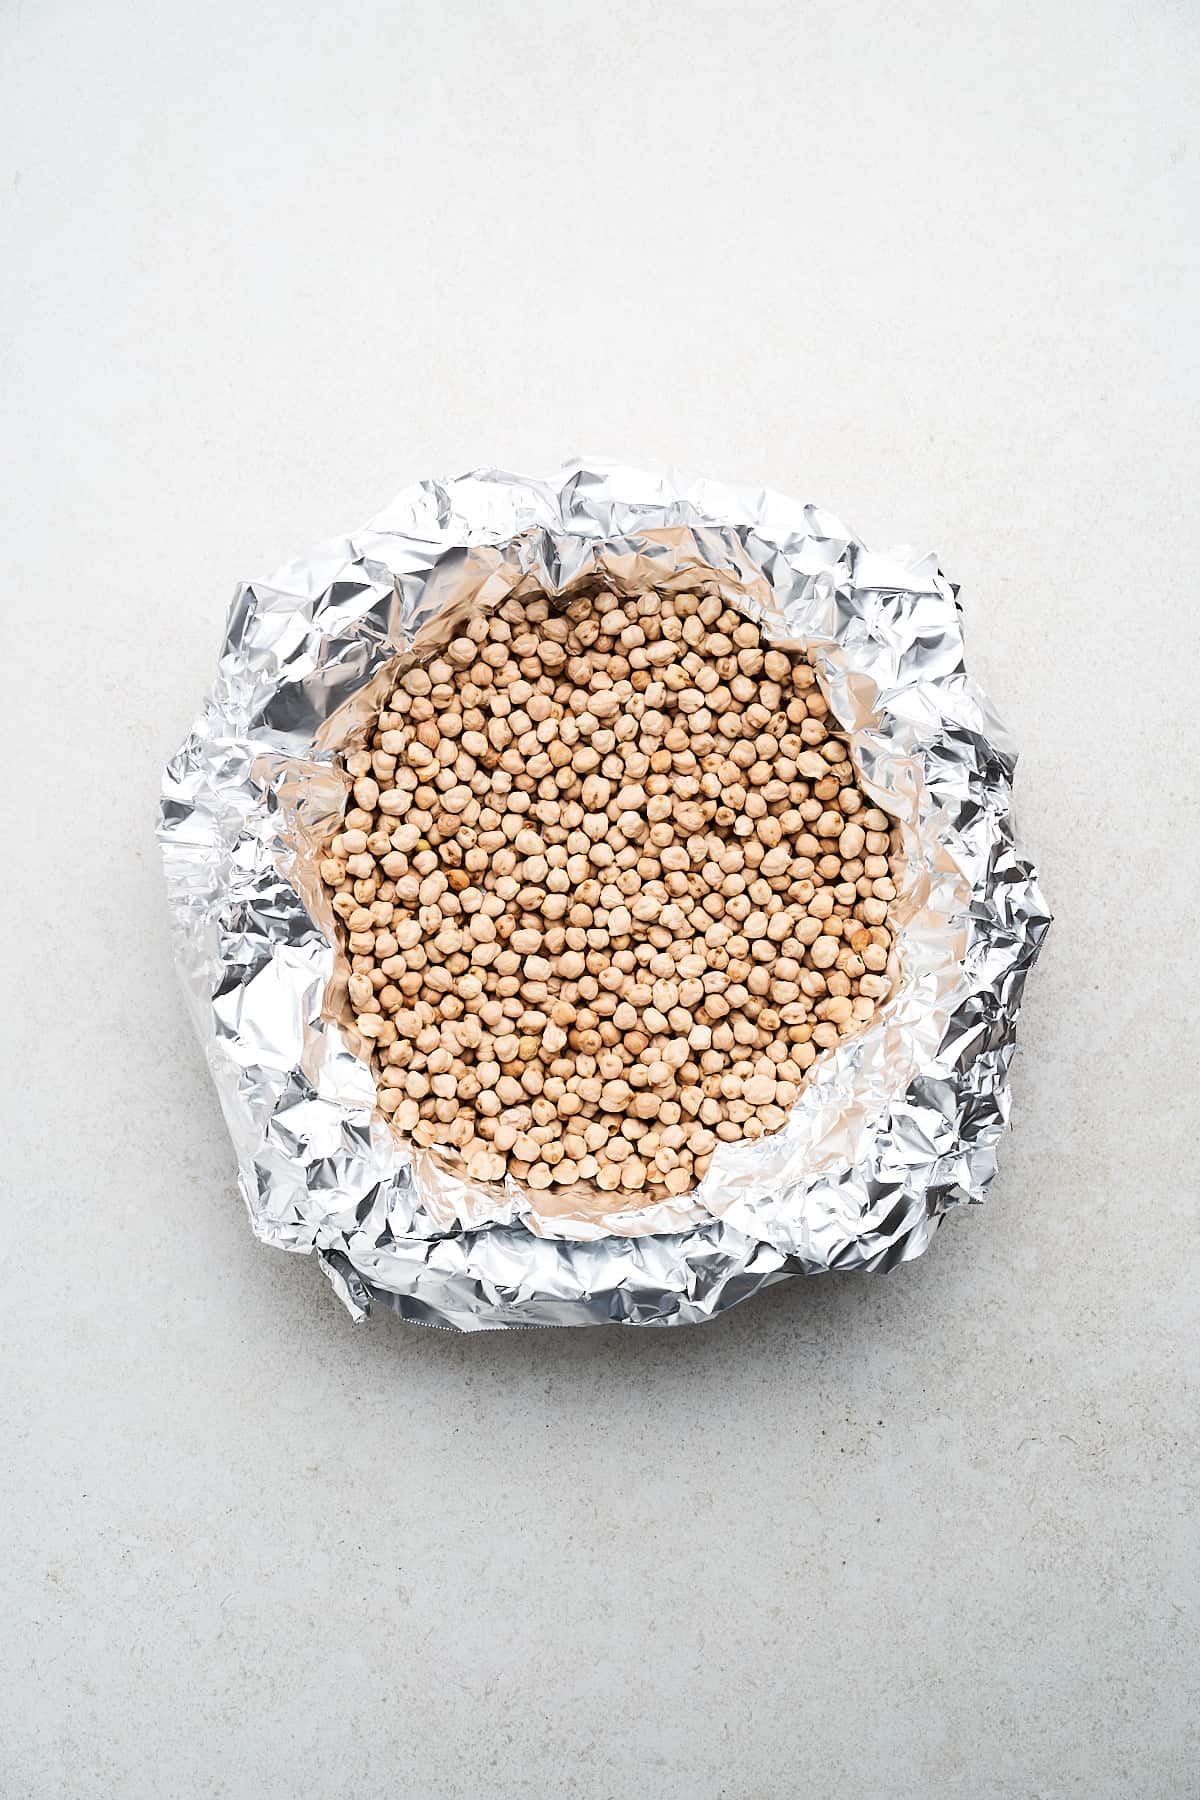
Step 1: Add the weights
Lay a piece of crinkled parchment paper or foil over your pie crust. You can fill this with pie weights if you own some, but dry beans or rice are great options you may already have kicking around. Using weights prevents the crust from puffing up in the oven.
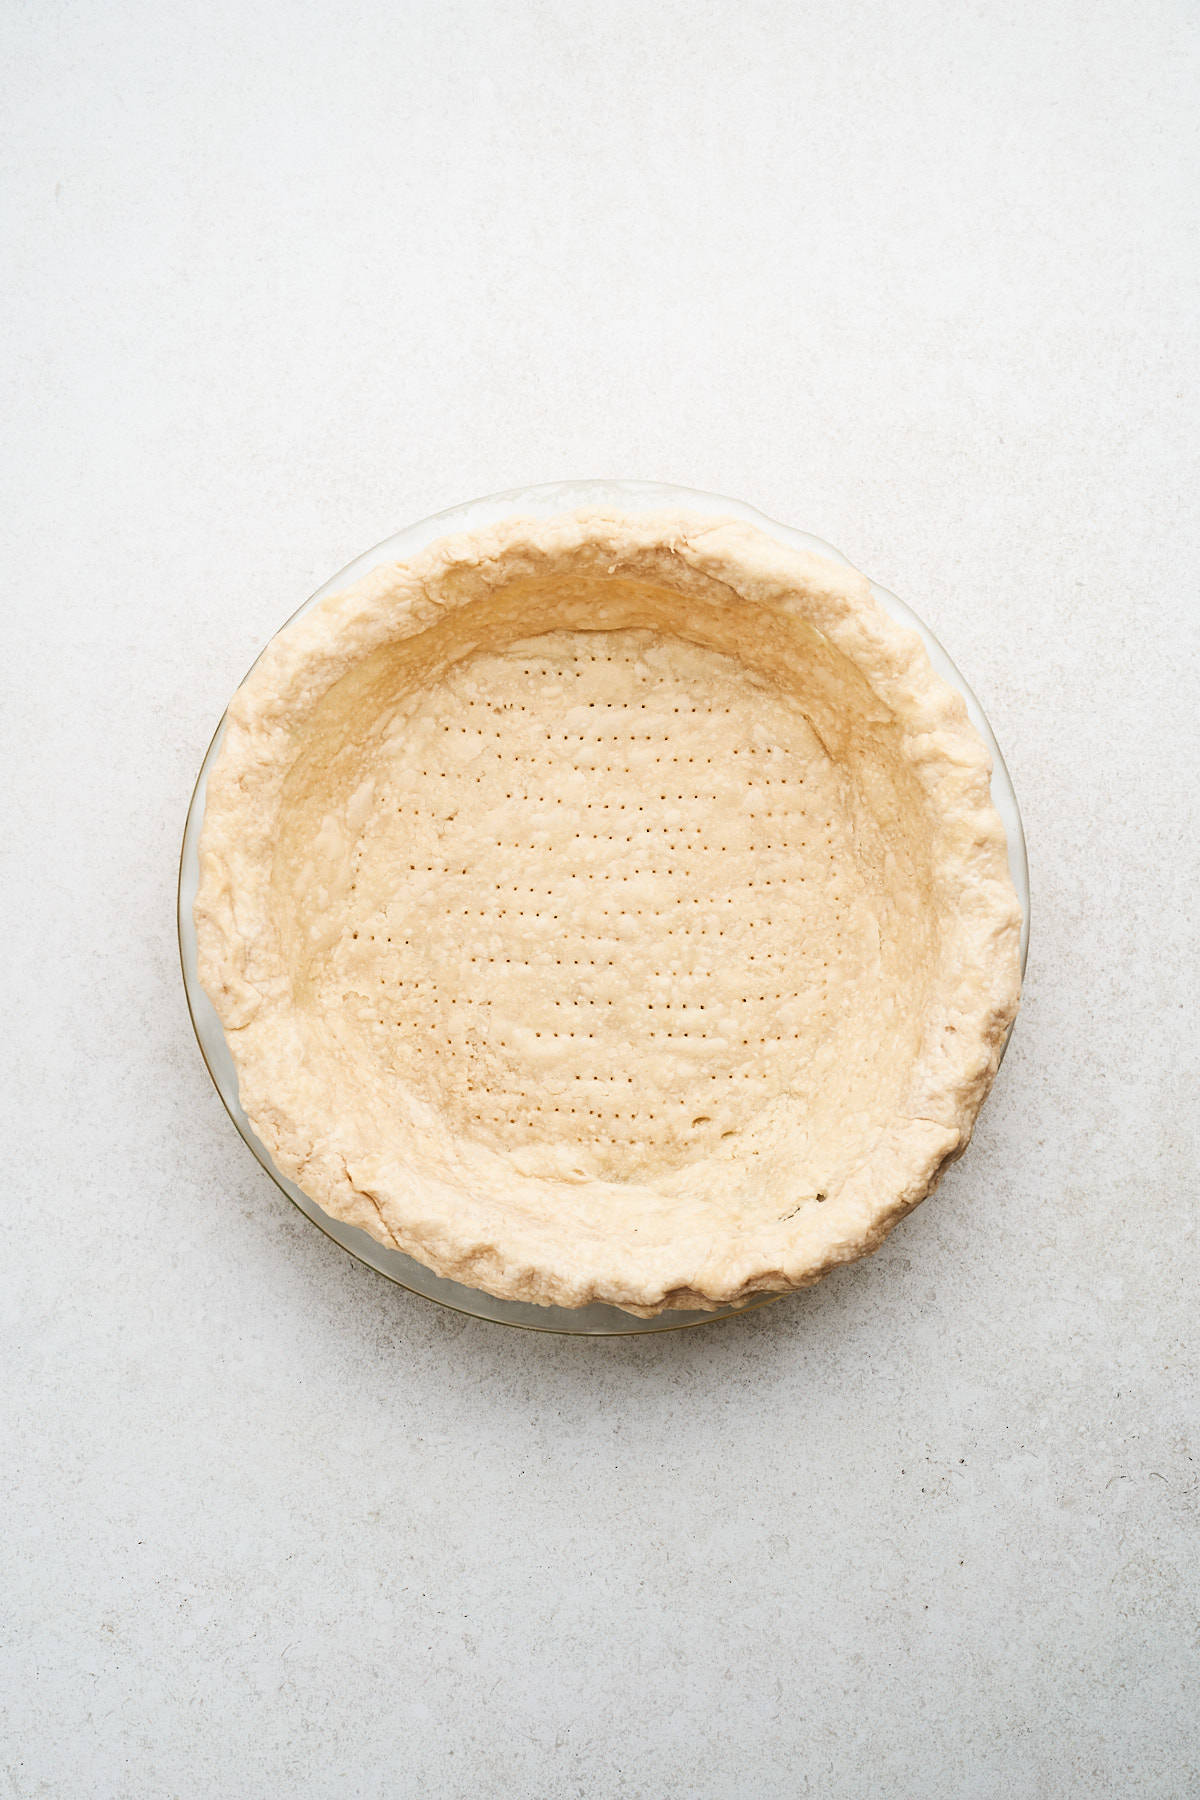
Step 2: First bake & dock
Bake your crust for 15 minutes or until the edges start to appear set. Remove your pie and lift out the parchment and weights. With a fork, prick the crust’s bottom and sides, which is known as docking, to further prevent the crust from puffing up.

Step 3: Final bake
Place your crust back in the oven. For a fully baked crust, keep it in for 14-15 minutes until it’s golden brown. For a partially baked crust, 7-8 minutes will do.
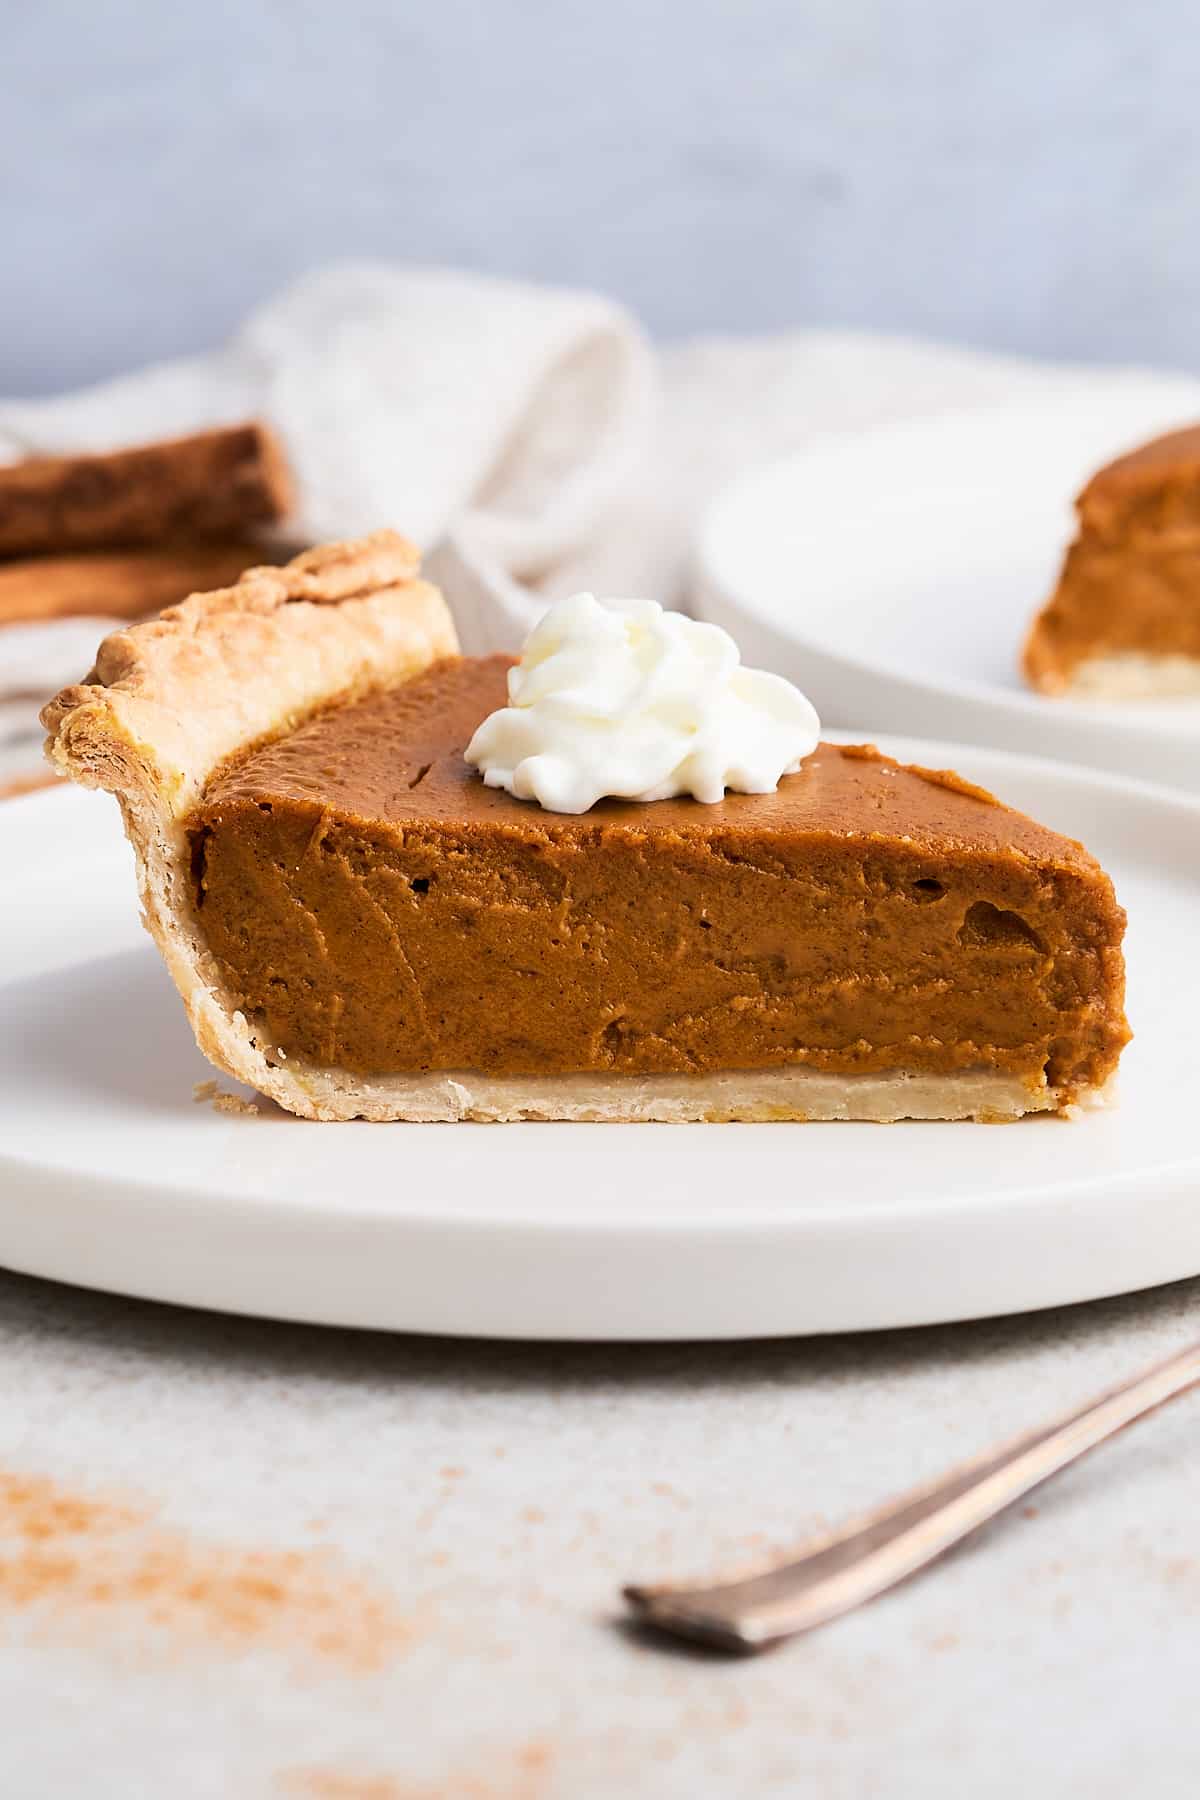
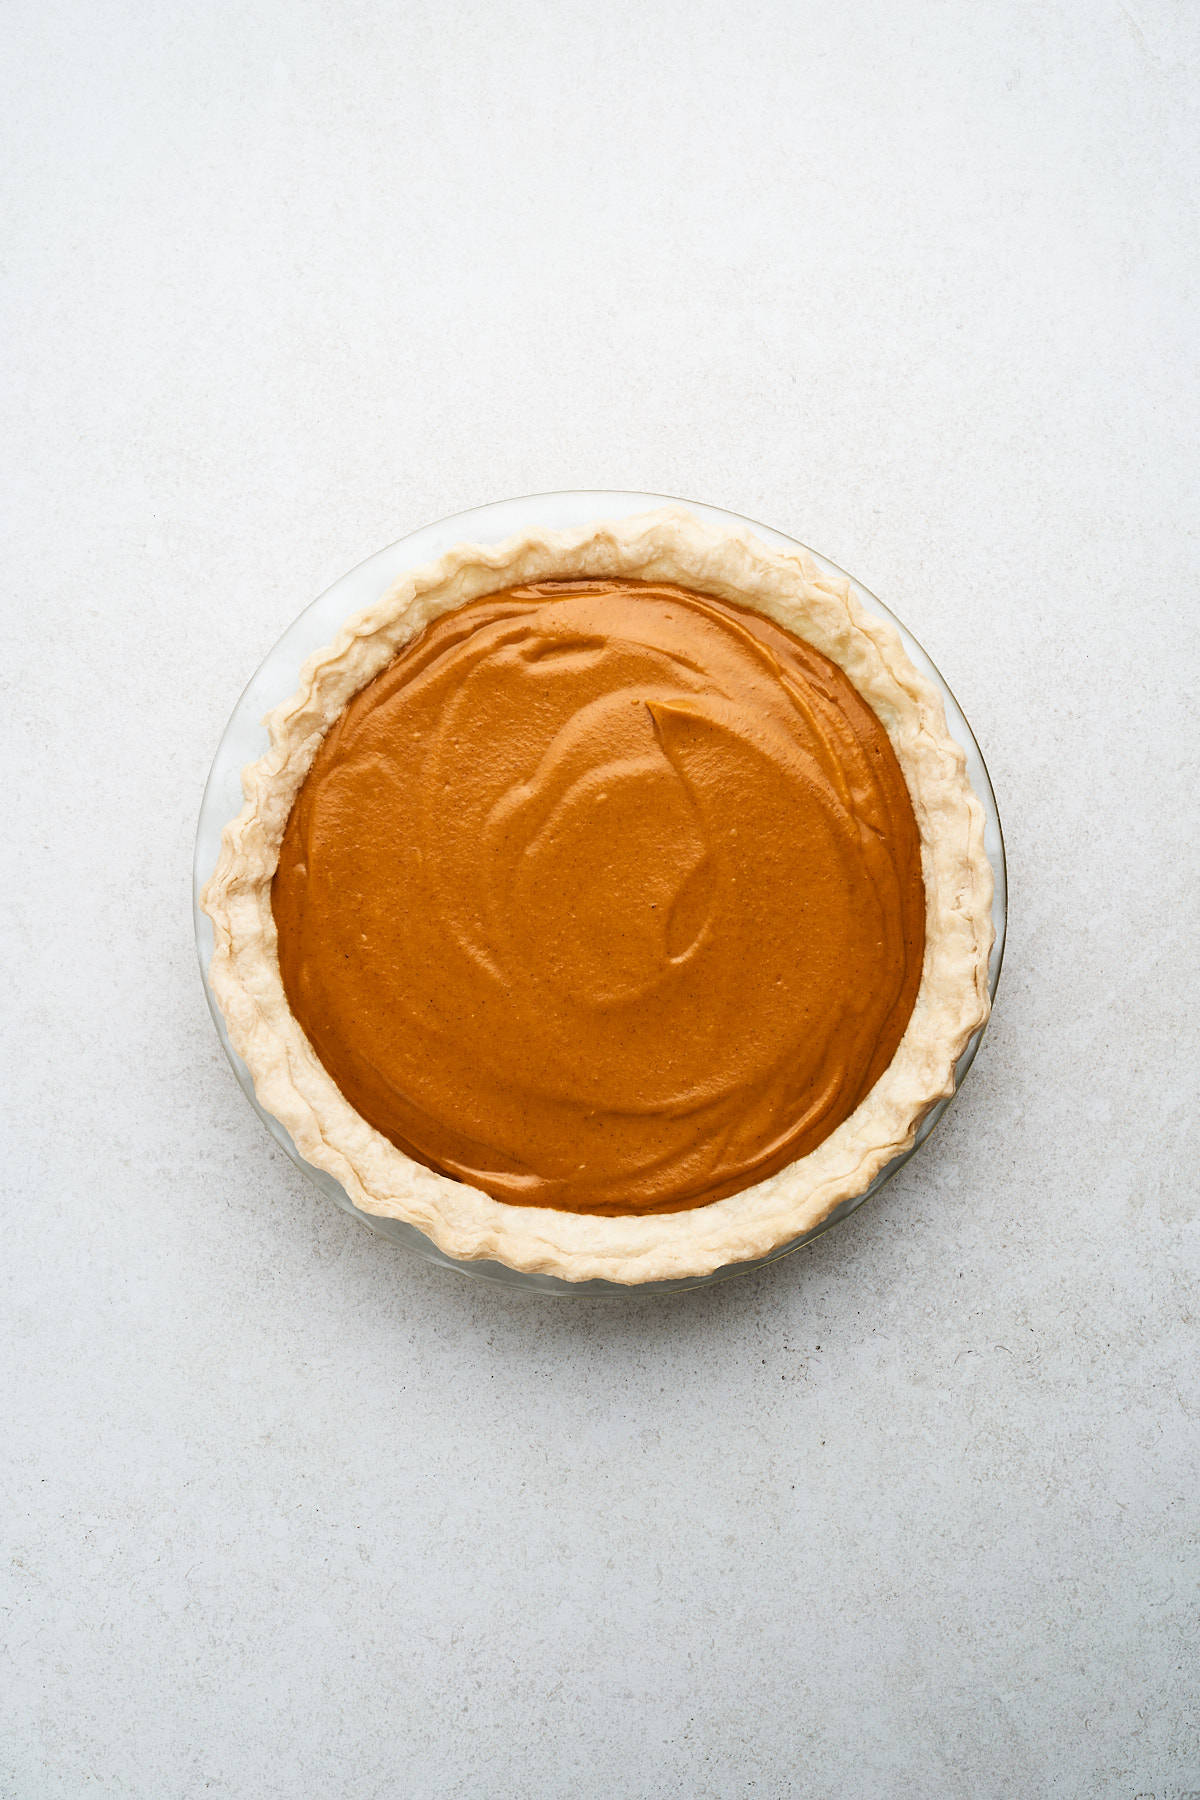
Remember, if you’re making a no-bake pie, let the crust cool down completely before adding any filling. If you’re baking the pie further, like with a vegan pumpkin pie, the filling can be added while the crust is still warm.
If you have questions about how to make this vegan pie crust recipe, check out our FAQs or leave a comment down below!
🧈 Is pie crust better with butter or shortening?
For the best vegan pie crust recipe, we use both shortening and vegan butter. When used in combination, they create the ultimate crust. You end up with something that’s buttery, flaky, and tender.
What does vegan butter do?
Vegan butter lends that unmistakable buttery flavor and contributes to the crust’s flakiness. However, in this recipe, we use only 2 tablespoons total (versus a typical half-and-half ratio). This is because it tends to melt more easily than its dairy counterpart.
What does shortening do?
Shortening is the key to pliability and structure! When you’re rolling and shaping your dough, it’s vegetable shortening that keeps things manageable. Plus, it has a high melting point, which means the crust will maintain its shape as it bakes away.
What about an all-butter vegan pie crust?
Don’t get us wrong, an all-butter pie crust has a beautifully light texture, largely due to butter’s water content. As it bakes, this water transforms into steam, raising the dough and crafting perfect flaky layers.
However, a vegan butter-only base can quickly lose its precise edges and shape, especially when compared to shortening. While both variants offer a delectable buttery and flaky taste, we recommend using a butter-and-shortening crust for the ideal texture and flavor.
🤫 The secret to flaky crust layers
When it comes to creating the best vegan pie crust, the fridge plays just as pivotal a role as the oven. You need to keep the pie dough ice cold so the fats don’t melt before they get into the oven.
If your fats start to melt, you won’t be able to achieve the quintessential flaky crust you’re after. As the fat pockets melt during the baking process, the steam creates perfectly flaky layers of crust that make homemade so much better than store-bought.
❄️ How to keep ingredients cold
Between mixing, rolling, and shaping your vegan pie crust, it can feel like a struggle to keep everything nice and cold. Here are a few strategies to make your life easier:
- Butter strategy: We place our vegan butter in the freezer an hour or so prior to making the pie. This way, it’s much less likely to melt as you work with the dough.
- Chilled dry mix: Place the flour in the fridge or freezer beforehand to chill. This simple step ensures even the base mix remains cold throughout the recipe.
- Cold bowl: You can place a mixing bowl in the freezer before starting to help keep all of the ingredients cold as you’re mixing.
🌡️ Storage
Making non-dairy pie crusts from scratch can be a little time-consuming, so it’s important to care for them if you’re making multiple ahead of time or once they’re baked. The goal is to keep them fresh and ensure their taste remains intact!
Refrigerating pie dough
You can leave unbaked pie dough wrapped in the fridge for up to 5 days. Once baked, keep your pie covered, in the refrigerator for up to 4-5 days. Make sure you give it time to completely cool before transferring it.
Freezing pie dough
We highly encourage freezing extra pie dough to have on hand, especially during the holidays when you need it most! The great news is that it freezes extremely well. Store the tightly wrapped discs of pie dough in the freezer for up to 3 months.
Thawing pie dough
Non-dairy pie crust dough can be thawed overnight in the refrigerator. Let it sit on the counter for about 10 minutes before rolling. It will be extra cold, which is a great starting point!

♻️ Variations
- Whole wheat flour: Swap out the all-purpose flour with whole wheat flour for a richer, nuttier taste.
- Gluten-free: Use a gluten-free flour blend for those with dietary restrictions.
- Pâte Sucrée: For a sweet crust, try adding a touch of sugar to the mixture.
- Herb-infused: Mix in some dried rosemary or thyme for a savory touch.
- Cocoa crust: Add 2-3 tablespoons of cocoa powder for a chocolatey twist. Just remember to account for the added dry ingredients by reducing the flour.
- Spiced: Add a pinch of spices, like cardamom or cinnamon for a festive touch.
🧑🍳 Top tips
- Use a glass pie dish: Glass pie dishes are our favorite because they conduct heat evenly, making sure the bottom of the crust browns evenly. Plus, you’re able to see when the sides have browned.
- Cold ingredients: Always use cold ingredients! You can also keep the bowl chilled for maximum flaky layer results.
- Keep the dough cold: If your dough starts to warm up as you’re working it, stop what you’re doing and chill it for about 15-20 minutes, then start again.
- Pulse don’t blend: When using a food processor, remember to pulse rather than continuously blend to avoid overworking the dough.
- Allow resting time: Don’t skip the resting period in the fridge. It helps hydrate the flour and makes the dough easier to work with and roll.
- Gentle rolling: Roll out the dough evenly but gently to prevent it from cracking or becoming tough.
- Pie shield: Prevent the edges from burning by using a pie shield. You can buy one or make your own using aluminum foil.
- Trimming excess: Leave about a 1-inch overhang when trimming the dough so you have enough crust to work with for crimping and other designs.
- Don’t forget the docking: This prevents puffing up during baking. Just a few fork pricks will do!
- Blind baking: Use pie weights or dry beans to keep the shape during blind baking.
- Don’t overmix: Once you add water, mix the dough gently for a tender crust.
🤔 Troubleshooting common issues
A tough pie crust
Tough pie crusts often arise from an insufficient amount of fat and over-manipulation of the dough. The best way to avoid this is to use the correct ratios in the recipe, be gentle, and limit handling the dough to just the necessary amount.
Not enough pie dough
This recipe is designed to yield one non-dairy pie crust. To ensure you’re adequately covered for the overhang and a decorative crust in a 9-inch pie dish, roll out your dough into a 12-inch circle with a thickness of approximately ⅛ inch.
Shrinking pie crust during baking
Pie crusts can sometimes retract down the sides of the dish if they puff up, especially during par-baking. To help prevent this, use pie weights and poke holes in the bottom and inside edges.
Dry and cracking dough on the edges when rolling
Pie dough that’s too dry usually hasn’t had enough ice water added, or the fats have been over-integrated into the dry mix. You need a balance. If you mix the fats excessively, the dough may seem overly moist before you’ve added sufficient water. If you’re experiencing this, lightly dampen your fingertips with icy water and mend the edges. Wait for a minute, then continue rolling.
Pie dough that’s crumbling and breaking apart
If your dough is crumbling and breaking apart, it likely has an imbalance of too much fat and not enough flour and water. This typically happens if the fats are worked into the dough excessively, especially if the ingredients weren’t given enough time to cool beforehand. To fix a crumbly dough, sprinkle a mix of cold water and flour over the fractured sections, blending them together with your fingers. Wait a minute or two then continue rolling.
💬 FAQ
Seasoning is key! Ensure you’ve added enough salt. Additionally, for sweet pies, a pinch of sugar helps elevate the flavor. For savory pies, try using herbs or a touch of black pepper.
Using cold ingredients and ensuring you have visible chunks of butter or shortening in your dough before rolling helps enhance flakiness. As it bakes, these fat pockets release steam, leading to more layers.
Yes, ice-cold water helps in preventing the fat from melting too quickly, which is essential for a flaky crust!
You can brush the crust with aquafaba before adding the filling. This creates a barrier that prevents the juices from turning the crust soggy. Additionally, blind baking is essential if the filling is watery.
Best Vegan Pie Crust
Equipment
- Pie dish
- Rolling Pin
- Food processor
- Mixing bowls
- Pie weights
Ingredients
- 1 ¼ cups all-purpose flour
- ½ teaspoon salt
- 6 tablespoons vegetable shortening
- 2 tablespoons cold vegan butter stick (cubed)
- 3-5 tablespoons ice-cold water
Instructions
Dough
- Add about 1 cup of the flour and salt to a food processor. Pulse 2-3 times to mix. Drop in cubed vegan butter and vegetable shortening, then pulse until no dry flour remains and the dough is starting to form clumps, about 20-25 pulses.
- Scrape the dough away from the sides, then add the rest of the flour and pulse a few more times until just incorporated. Transfer the dough to a mixing bowl.
- Starting with 3 tablespoons, pour ice-cold water over top and fold and press the dough with a spatula until it comes together, adding more water as needed. The dough should barely stick together when you squeeze a handful.
- Note: If you don’t have a food processor, whisk the flour and salt together in a mixing bowl. Incorporate the shortening with a pastry cutter or two forks until it resembles pea-size granules.
Chill
- Form the dough into a disc, wrap it tightly in cling wrap, and transfer it to your fridge to chill for at least 30-60 minutes but preferably 2 hours. The resting period helps hydrate the flour, making rolling out much easier.
- If you’ve let the dough chill for longer than 60 minutes, allow it to sit out at room temperature for ~10 minutes before rolling.
Roll
- Lightly flour a working surface and a rolling pin. Roll the dough out to about 12 inches for a 9-inch pie (or enough that it’s ~2-3 inches bigger than your pan).
- Pick the crust up by carefully rolling it over your rolling pin. Transfer and unroll it over the pie dish, gently pressing down the edges to fit the crust into the dish.
- Trim and fold over any edges, then pinch or crimp the edges however you want. Place the pie dish in the fridge for 30 minutes prior to filling or baking.
To blind bake
- If the recipe calls for blind-baking the crust, preheat the oven to 375°F.
- Place a piece of parchment paper or foil over the crust (it helps to crinkle it beforehand to make fitting it into the crust easier).
- Fill it with pie weights, ensuring they spread out to cover the entire bottom and press against the sides of the crust. If you don’t have pie weights, dry beans or uncooked rice can work as an alternative.
- Place the pie crust in the preheated oven. Bake for about 15 minutes until the edges are starting to brown and appear set.
- Remove the pie from the oven, then carefully remove the parchment with the weights. Using a fork, lightly prick the bottom and sides of the crust. This process, called "docking," will help prevent the crust from puffing up as it finishes baking.
- Return the pie crust to the oven. For a fully baked crust, bake for about 14-15 more minutes until the bottom crust is golden brown. For a partially baked crust, bake it for 7-8 more minutes until the crust is just beginning to brown.
- If you’re making a no-bake pie, let the blind-baked crust cool completely before adding the filling. For a pie that will be baked longer (like vegan pumpkin pie), the filling can be added when the crust is still warm. Happy eating!
Notes
- Use a glass pie dish: Glass pie dishes are our favorite because they conduct heat evenly, making sure the bottom of the crust browns evenly. Plus, you’re able to see when the sides have browned.
- Cold ingredients: Always use cold ingredients! You can also keep the bowl chilled for maximum flaky layer results.
- Keep the dough cold: If your dough starts to warm up as you’re working it, stop what you’re doing and chill it for about 15-20 minutes, then start again.
- Pulse don’t blend: When using a food processor, remember to pulse rather than continuously blend to avoid overworking the dough.
- Allow resting time: Don’t skip the resting period in the fridge. It helps hydrate the flour and makes the dough easier to work with and roll.
- Gentle rolling: Roll out the dough evenly but gently to prevent it from cracking or becoming tough.
- Pie shield: Prevent the edges from burning by using a pie shield. You can buy one or make your own using aluminum foil.
- Trimming excess: Leave about a 1-inch overhang when trimming the dough so you have enough crust to work with for crimping and other designs.
- Don’t forget the docking: This prevents puffing up during baking. Just a few fork pricks will do!
- Blind baking: Use pie weights or dry beans to keep the shape during blind baking.
- Don’t overmix: Once you add water, mix the dough gently for a tender crust.
- Nutritional information is a rough estimate and should not be taken as health advice.
Nutrition

Justine Drosdovech is a food writer, photographer, and one of the founders of Broke Bank Vegan. She is a self-taught plant-based chef but uses her healthcare background to craft dishes that are both delicious and nourishing.